Contents
Existing Practices
Using the Annotator Training Module
Best Practices for Using the Module
Conclusion
Encord Blog
How to Use the Annotator Training Module
TLDR;
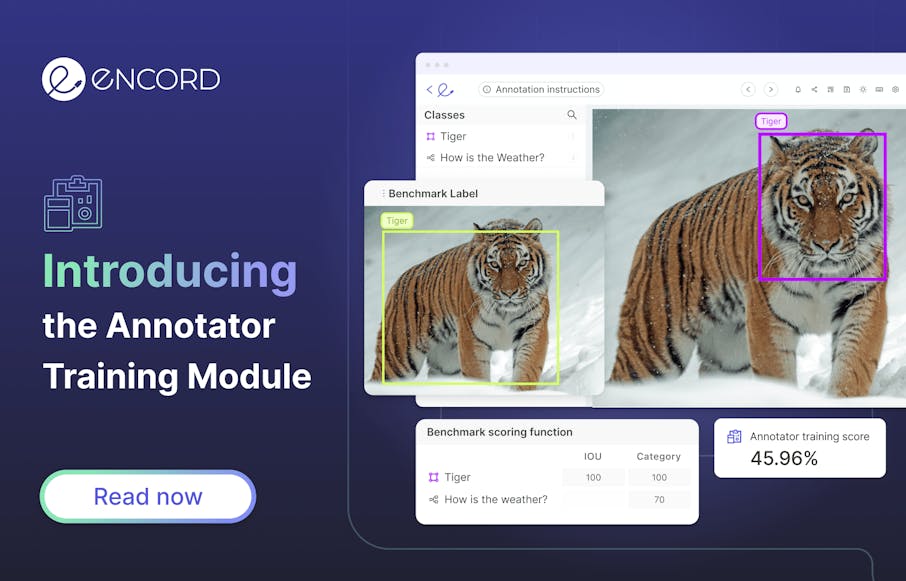
The purpose of this post is to introduce the Annotator Training Module we use at Encord to help leading AI companies quickly bring their annotator team up to speed and improve the quality of annotations created. We have created the tool to be flexible for all computer vision labeling tasks across various domains including medical imaging, agriculture, autonomous vehicles, and satellite imaging. It can be used for all annotation types - from bounding boxes and polygons to segmentation, polylines, and classification.
Correct human data annotations and labels are key to training high-quality machine learning models. Annotated objects can range from simple bounding boxes to complex segmentations. We may require annotators to capture additional data describing the objects they are annotating. Encord’s powerful ontology editor allows us to define nested attributes to capture as much data as needed.
Even for seemingly simple object primitives, such as bounding boxes, there may be nuances in the data which annotators need to account for. These dataset-specific idiosyncrasies can be wide-ranging, such as object occlusion or ambiguities in deciding the class of an object. It's critical to ensure consistency and accuracy in the annotation process.
Existing Practices
Data operations teams today follow old and outdated practices including having teams view the data using simple tools such as video players and then answer questions before starting annotations.
This does not address the true complexity of accurately annotating many datasets at the quality level required for machine learning algorithms.
Teaching annotators how to work with data, understand labeling protocols, and learn annotation tools can take weeks or even months.
By combining all three into one, and automating the evaluation process, our new module enables a data operations team to scale its efforts across hundreds of annotators in a fraction of the time – allowing for large gains in cost-savings, efficiency, and helping teams focus on educational efforts on the most difficult assets to annotate.
One platform for creating better training data and debugging models.
To this end, Encord Annotate now comes with a new powerful Annotator Training Module out-of-the-box so that annotators can learn what is expected of them during the annotation process.
At a high level, this consists of first adding ground truth annotations to the platform against which annotators will be evaluated. During the training process, annotators are fed unlabelled items from the ground truth dataset, which they must label.
A customizable scoring function converts their annotation performance into numerical scores. These scores can be used to evaluate performance and decide when annotators are ready to progress to a live training project.
Using the Annotator Training Module
Guide contains following steps:
- Step 1: Upload Data
- Step 2: Set up Benchmark Project
- Step 3: Create Ground Truths Labels
- Step 4: Set up and Assign Training Projects
- Step 5: Annotator Training
- Step 6: Evaluation
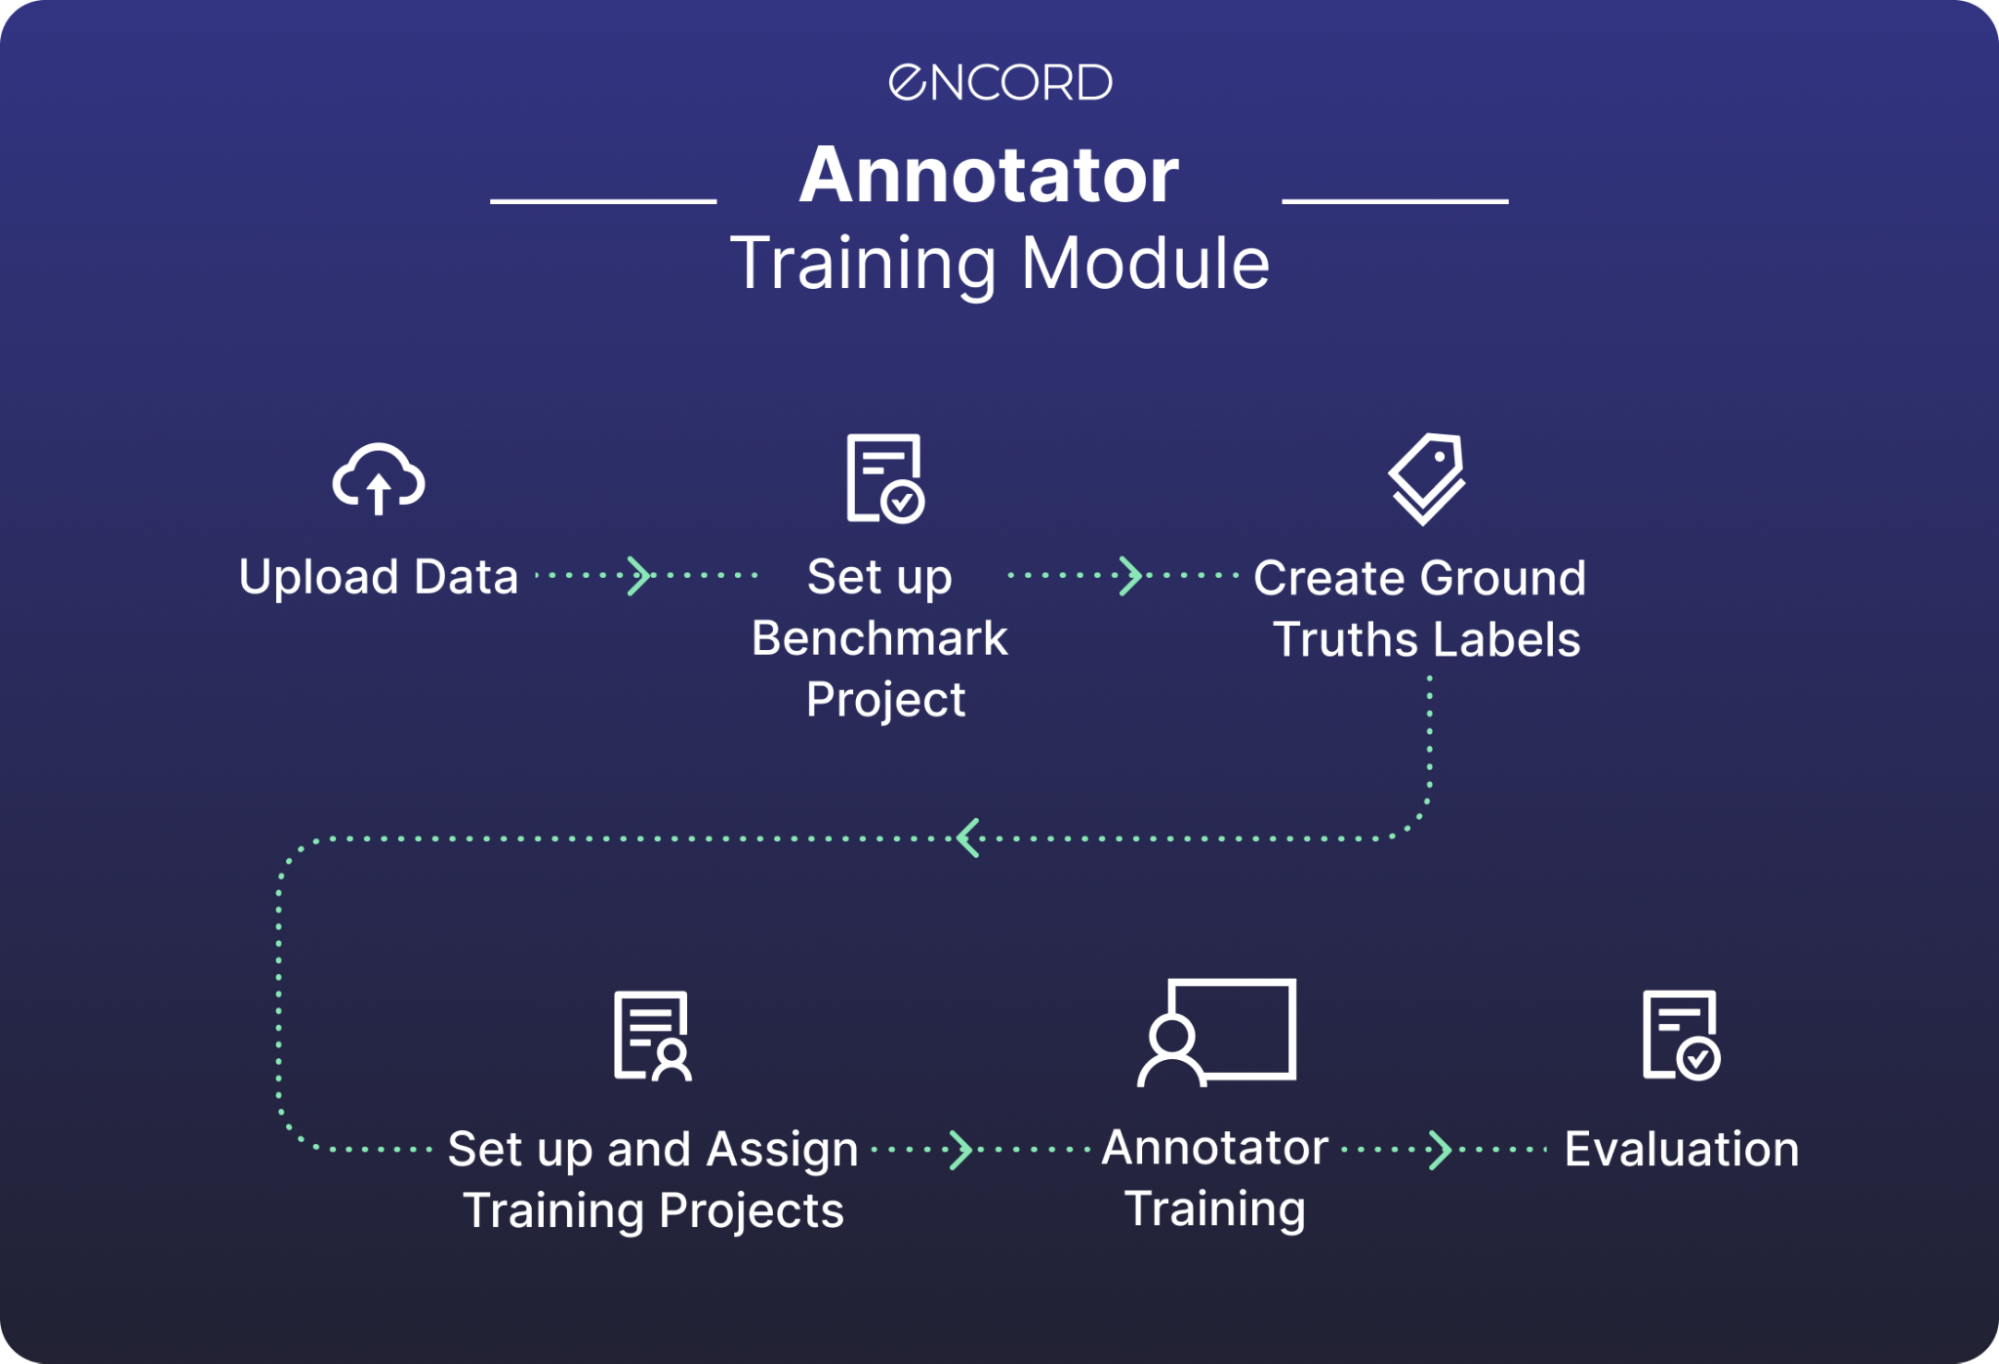
This walkthrough will show you how to use the Annotator Training Module in the Encord Annotate Web app. This entire workflow can also be run programmatically using the SDK.
Step 1: Upload Data
First, you create a new dataset that will contain the data on which your ground truth labels are drawn. For this walkthrough, we have chosen to annotate images of flowers from an open source online dataset.
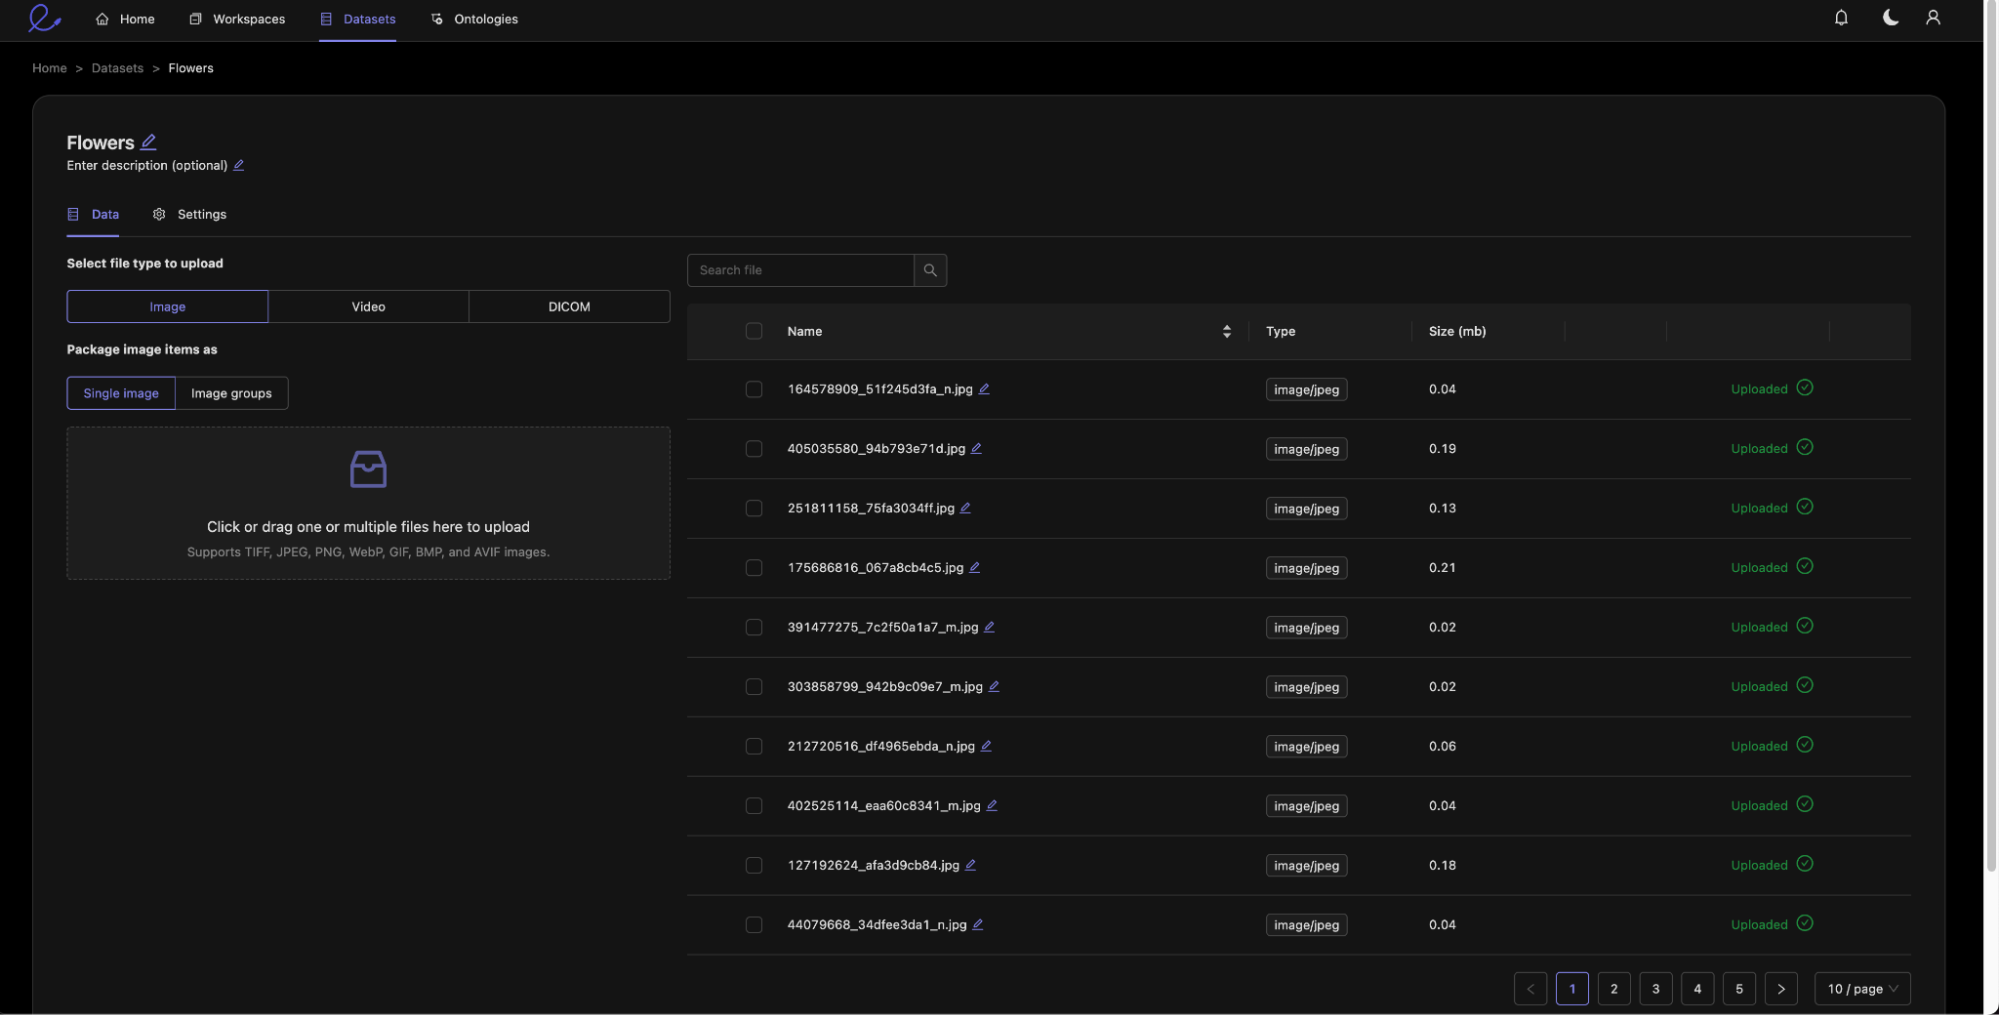
Step 2: Set up Benchmark Project
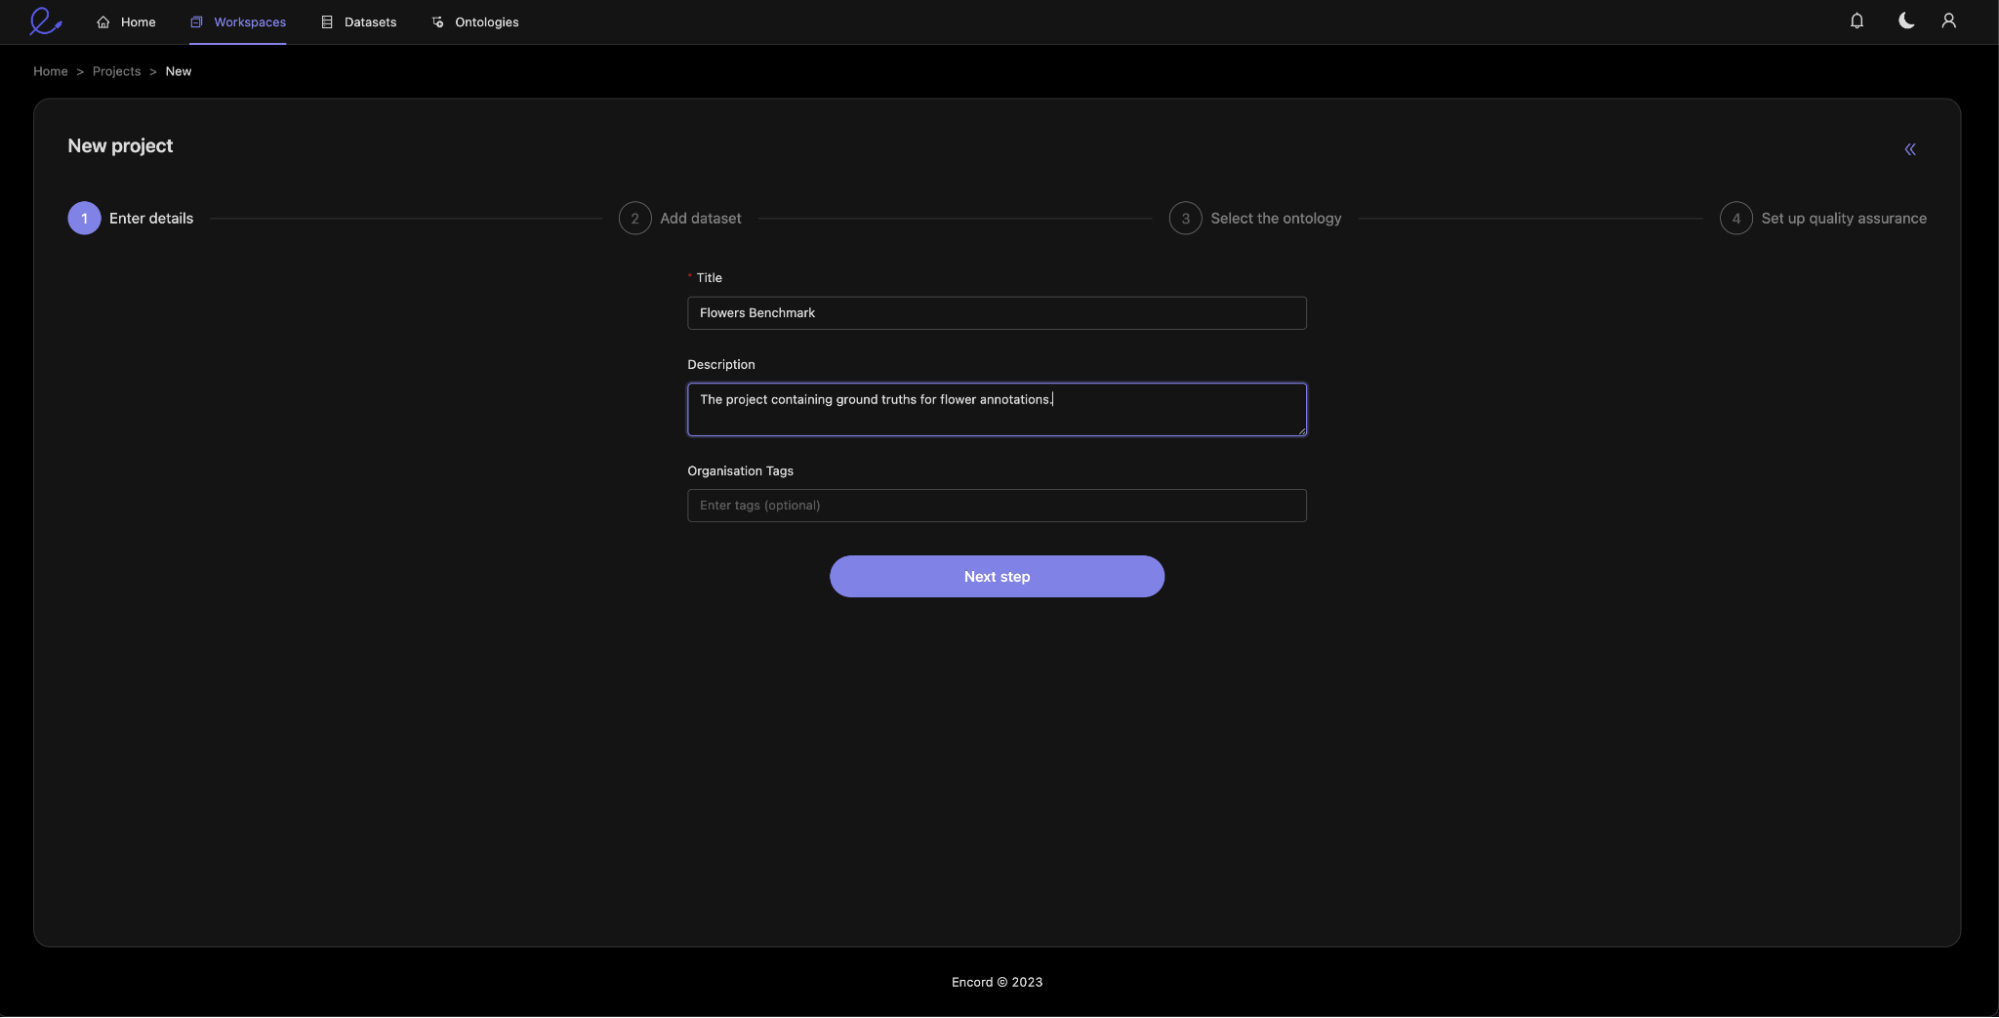
Next, you create a new standard project from the Projects tab in the Encord Annotate app.

You name the dataset and add an optional description (We recommend to tag it as a Training Ground Truth dataset).
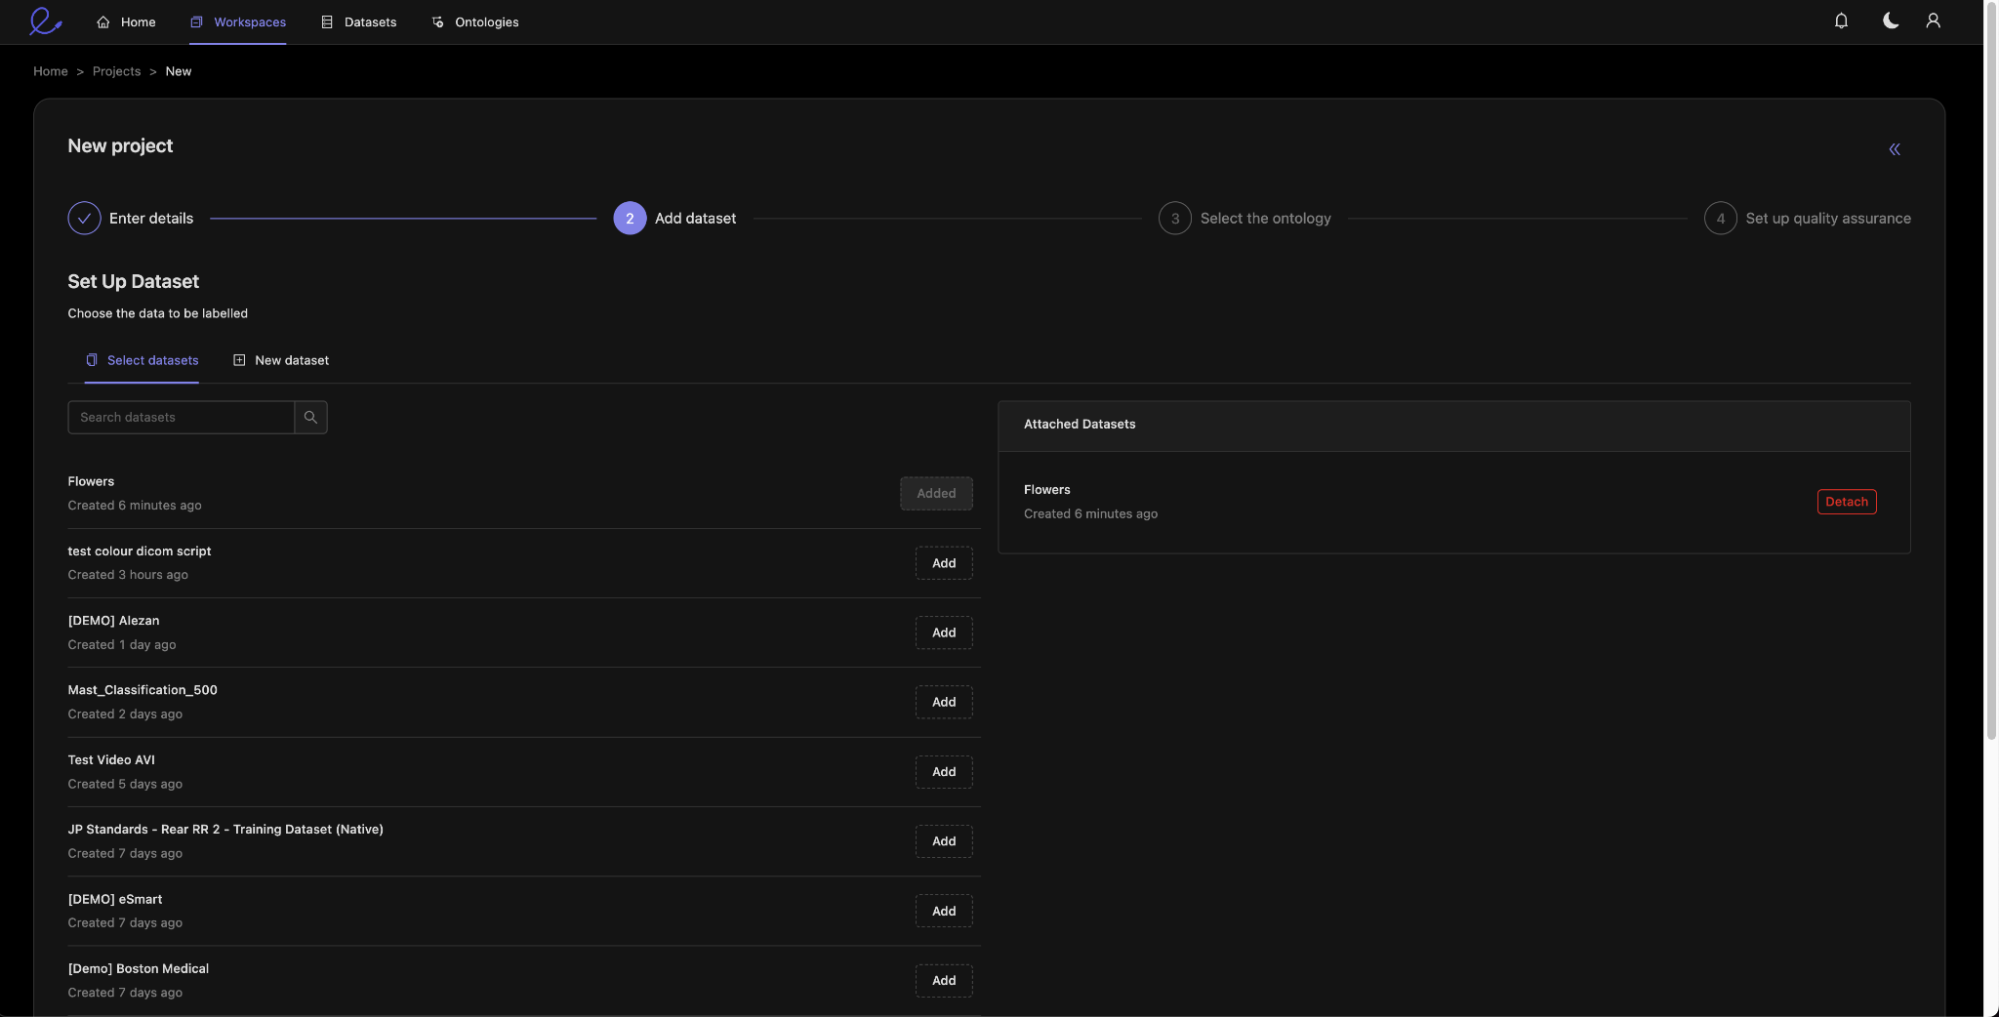
We then attach the dataset created in Step 1 containing the unlabelled flower images.
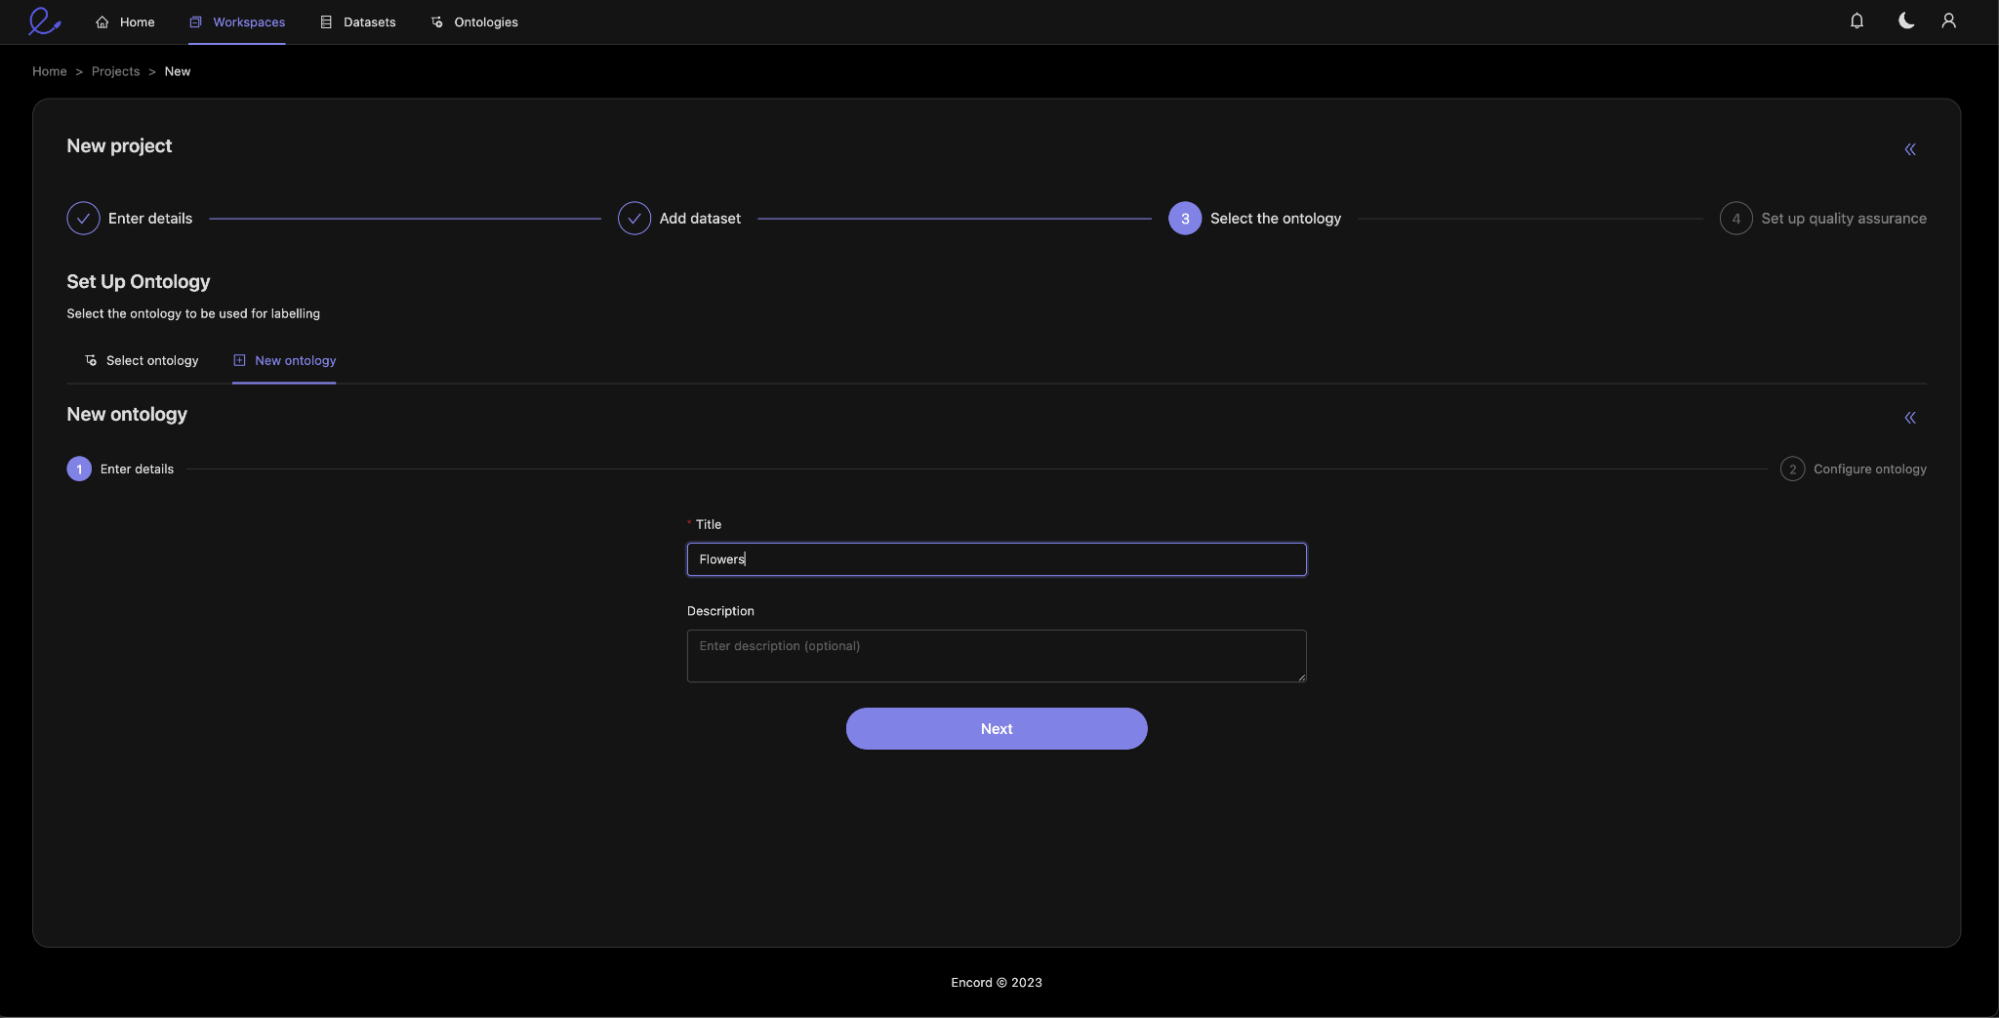
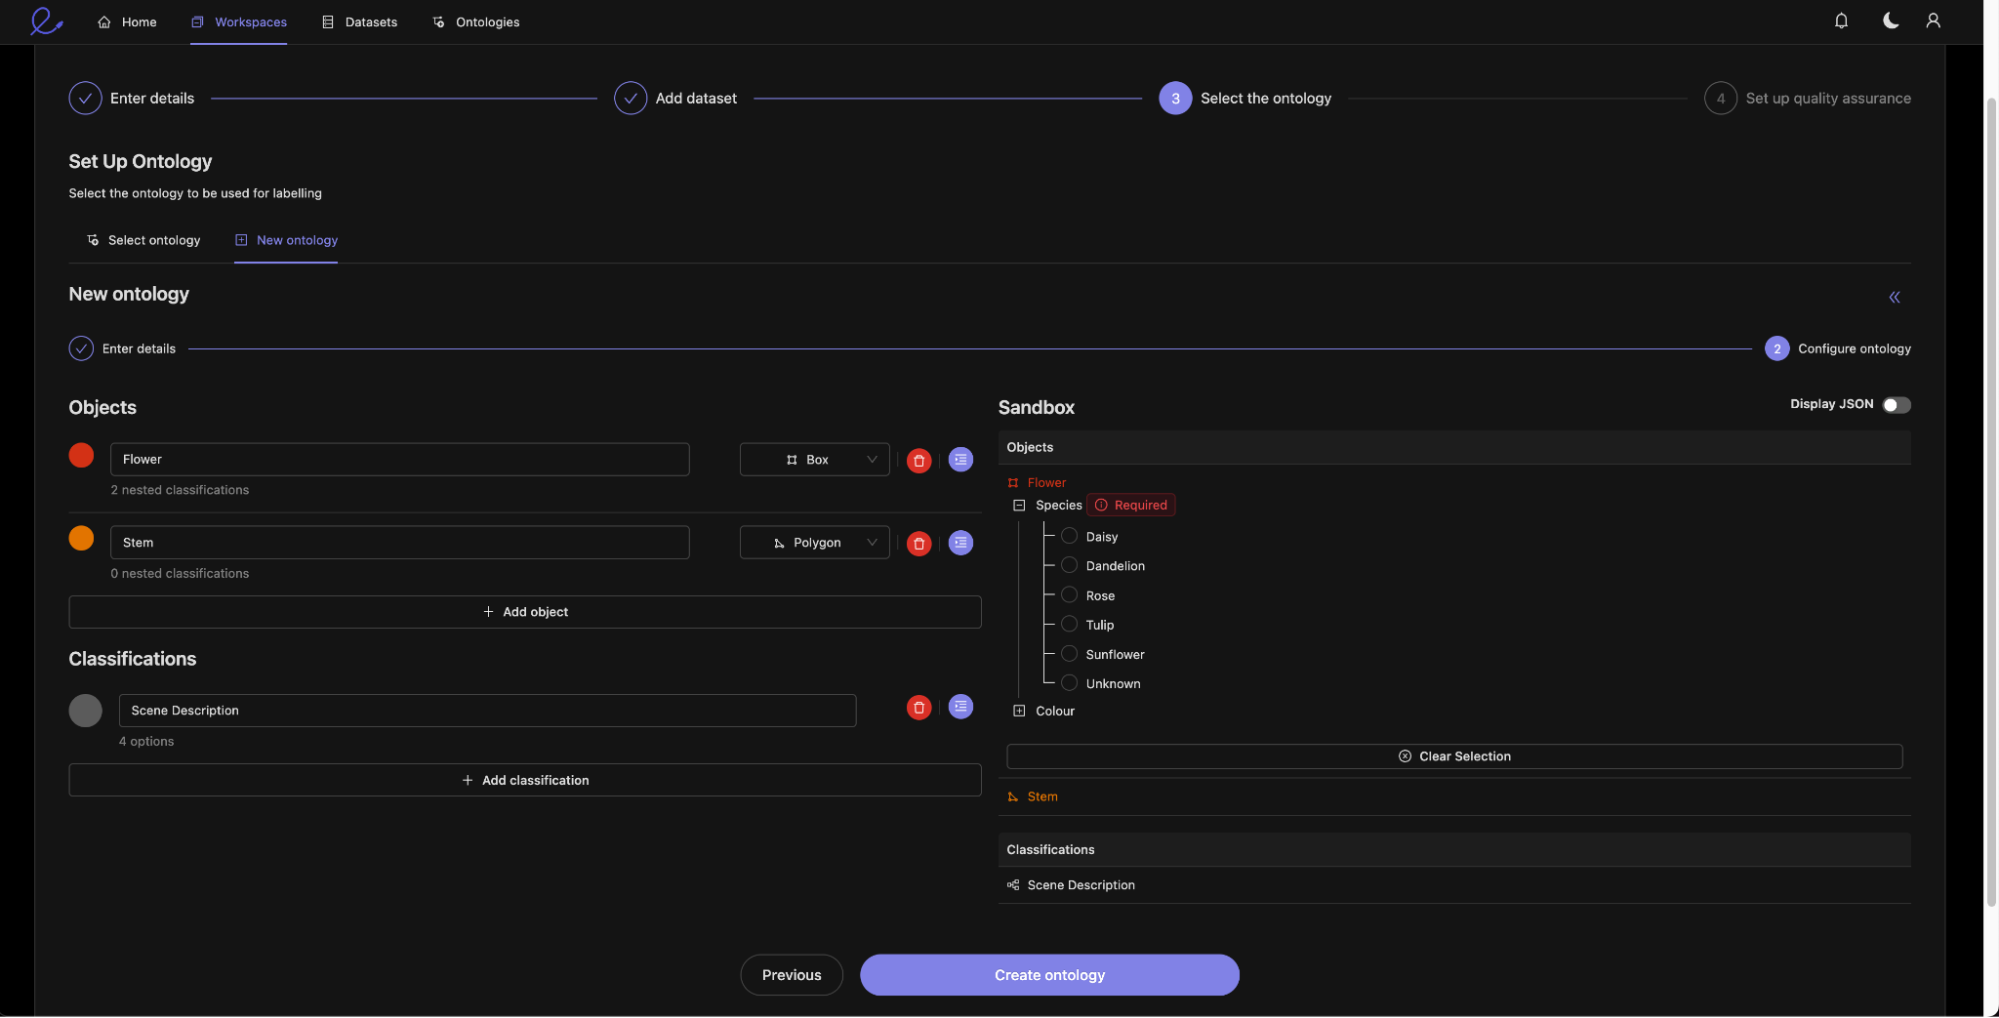
Now we create an ontology that will be appropriate to the flower labelling use case, we could also attach an existing ontology if we wanted.
Here you can see that we are specifying both scene-level classifications and geometrical objects (both bounding boxes and polygons). Within the objects being defined, you are making use of Encord’s flexible ontology editor to define nested classifications. This helps you capture all the data describing the annotated objects in one place.
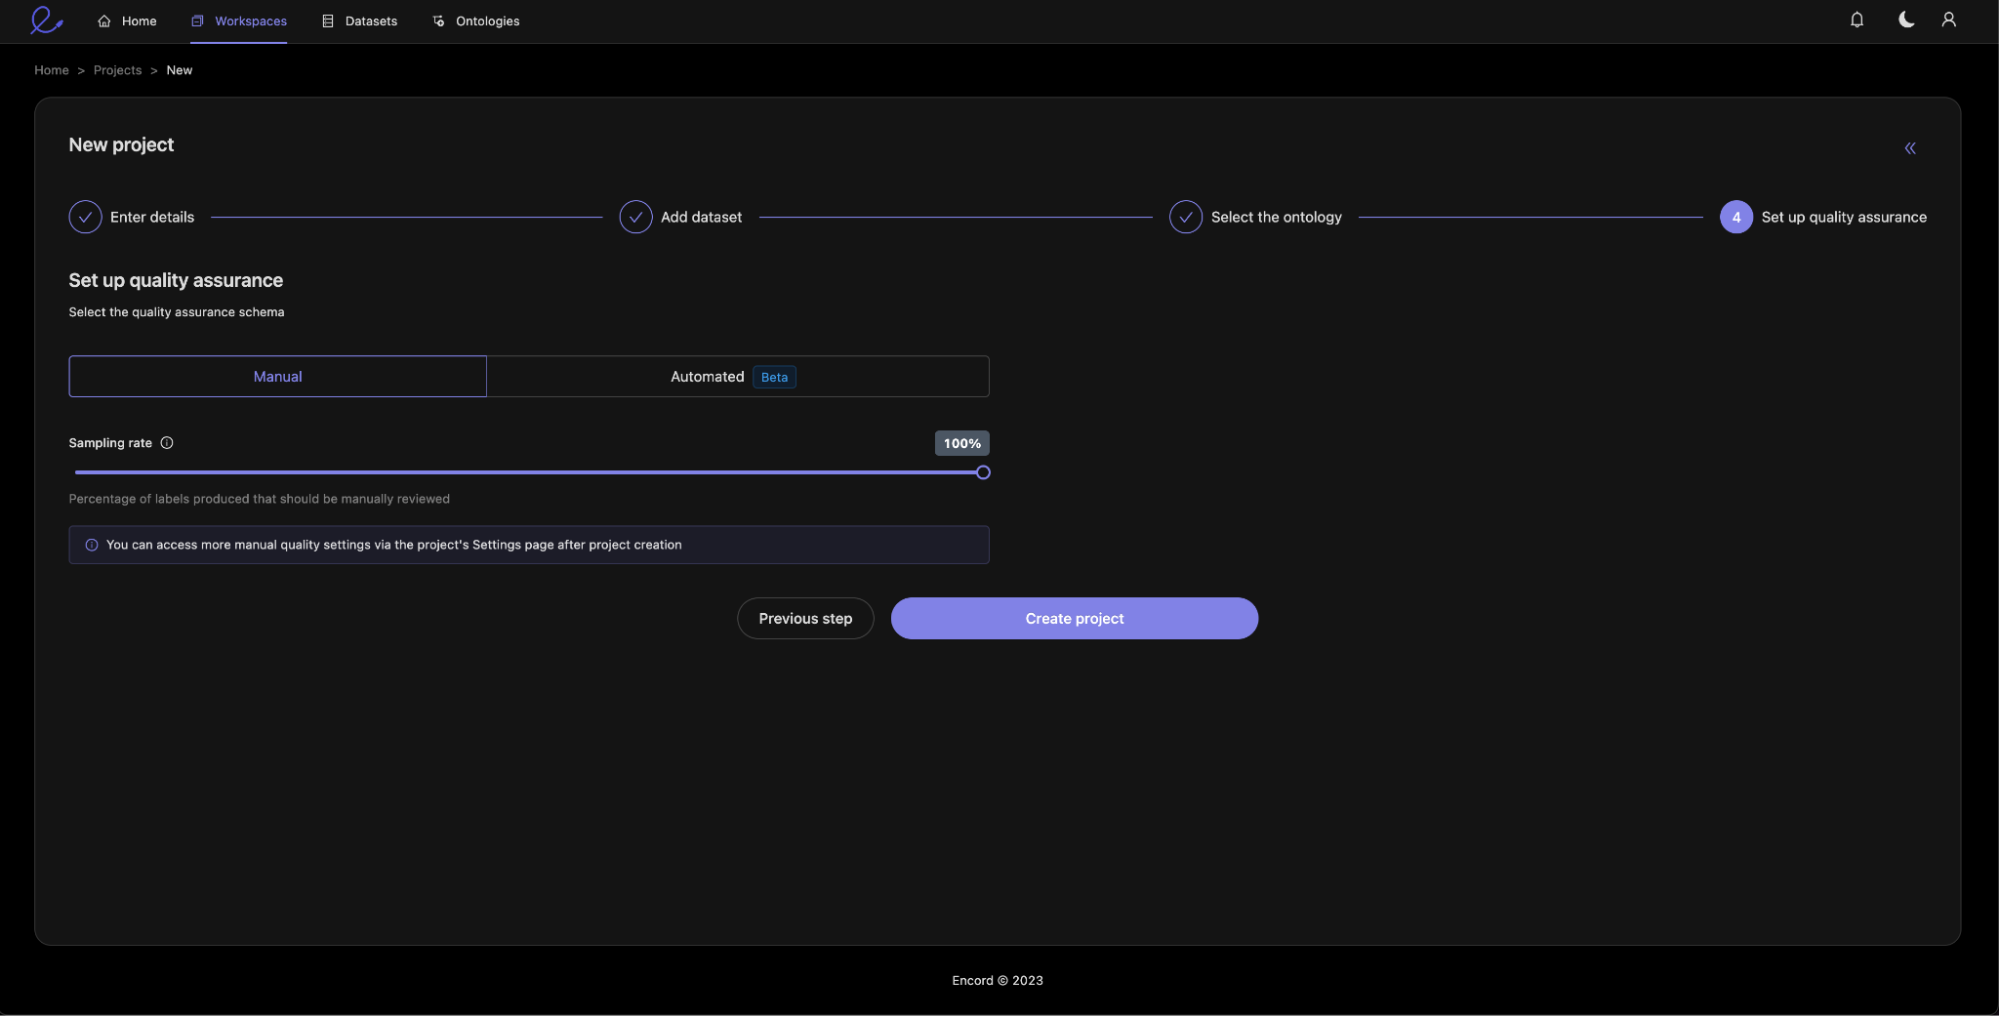
And lastly, you create the project.
Step 3: Create Ground Truth Labels
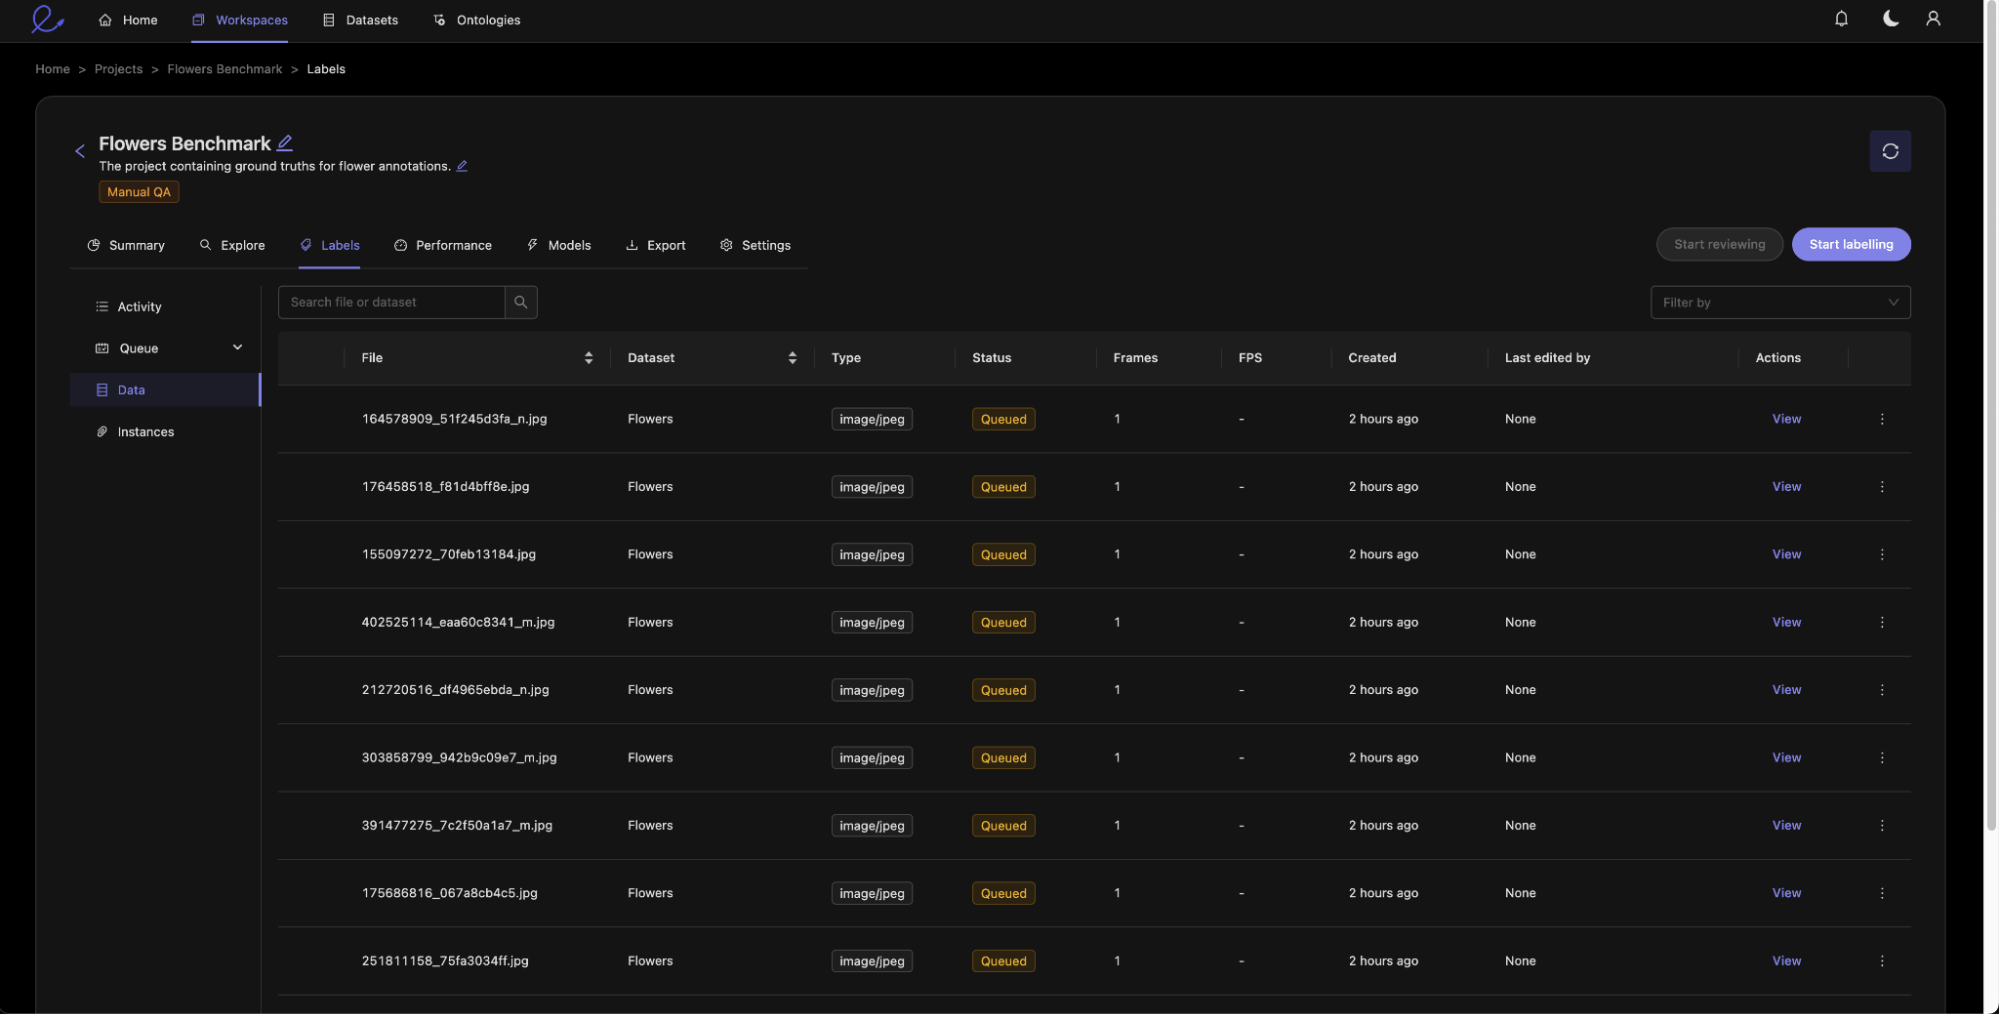
Now that you have created your first benchmark project, you need to create ground truth labels. This can be achieved in two ways.
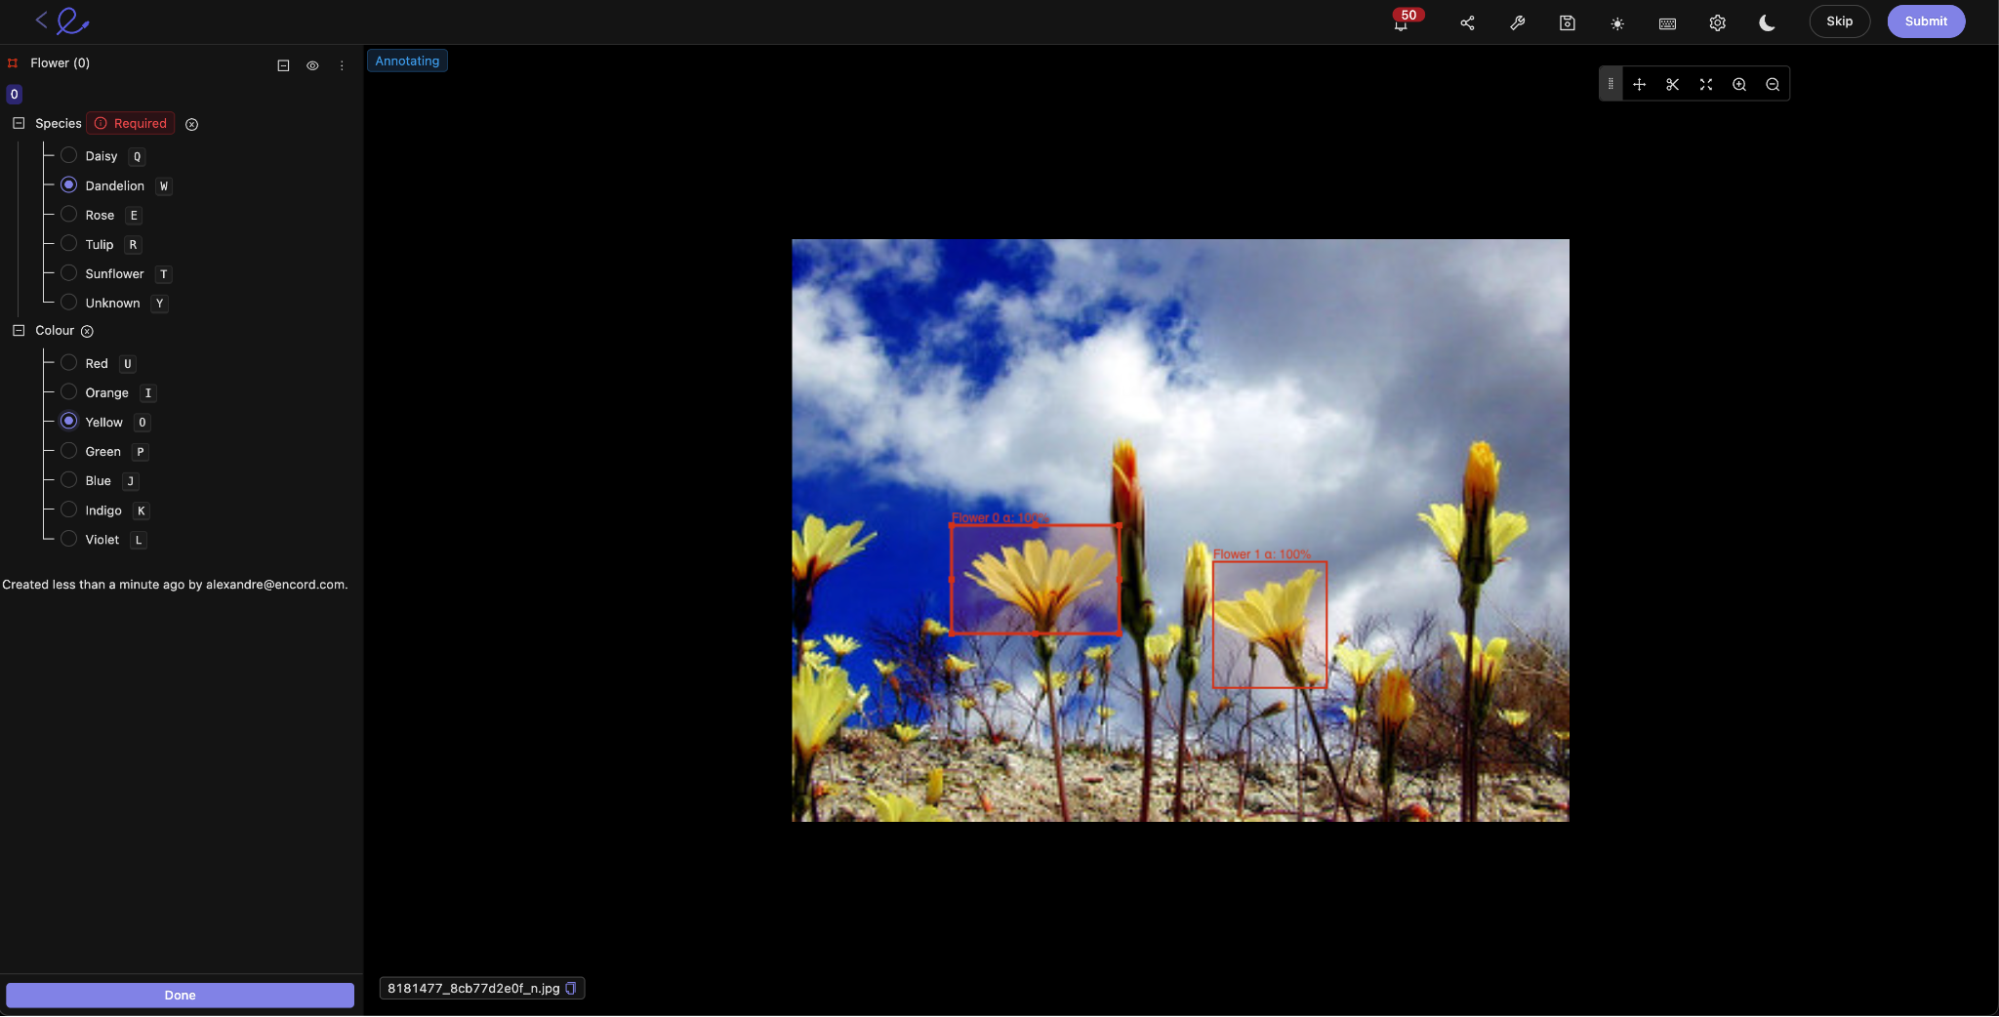
- The first option is having subject matter experts use Encord to manually annotate data units, as shown here with the bounding boxes drawn around the flowers.
- The second option is to use the SDK to programmatically upload labels that were generated outside Encord.
Now that you have created the ground truth labels, proceed to set up the training projects.
Step 4: Set up and Assign Training Projects
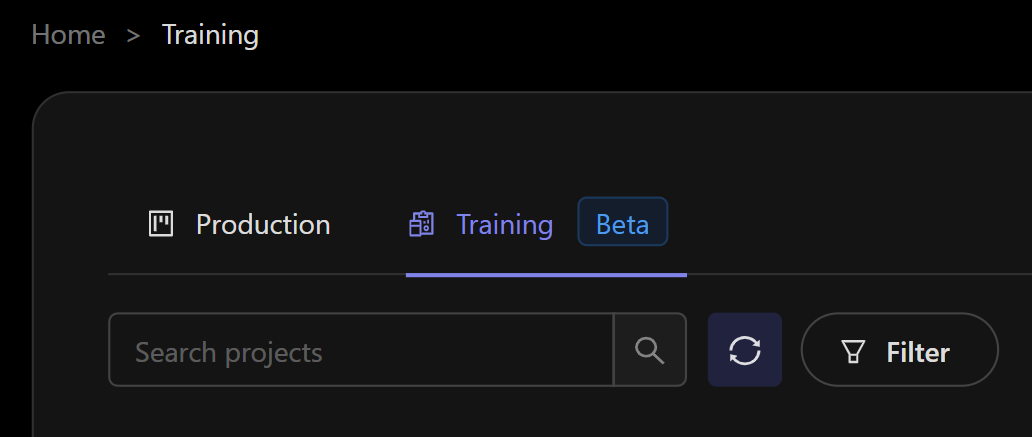
Let us create a training project using the training tab in the project section.
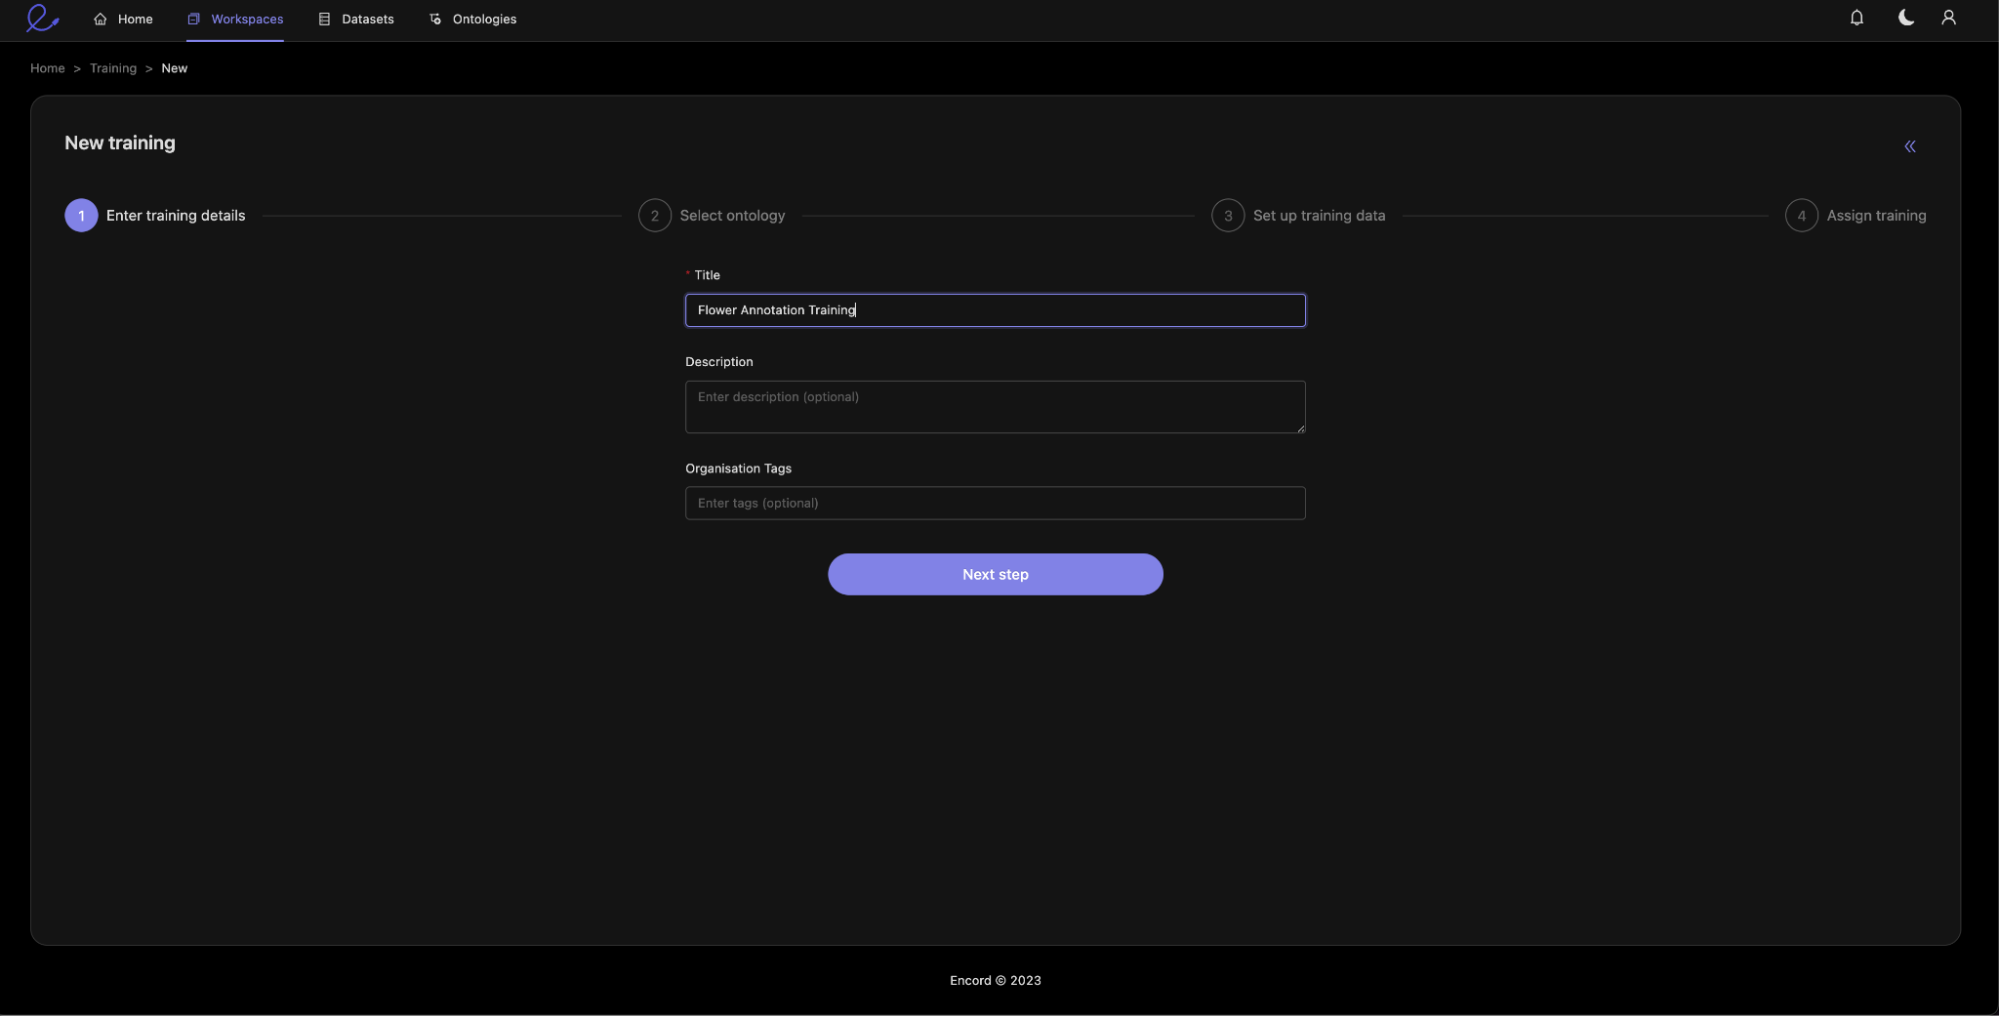
Create your Training project and add an optional description.
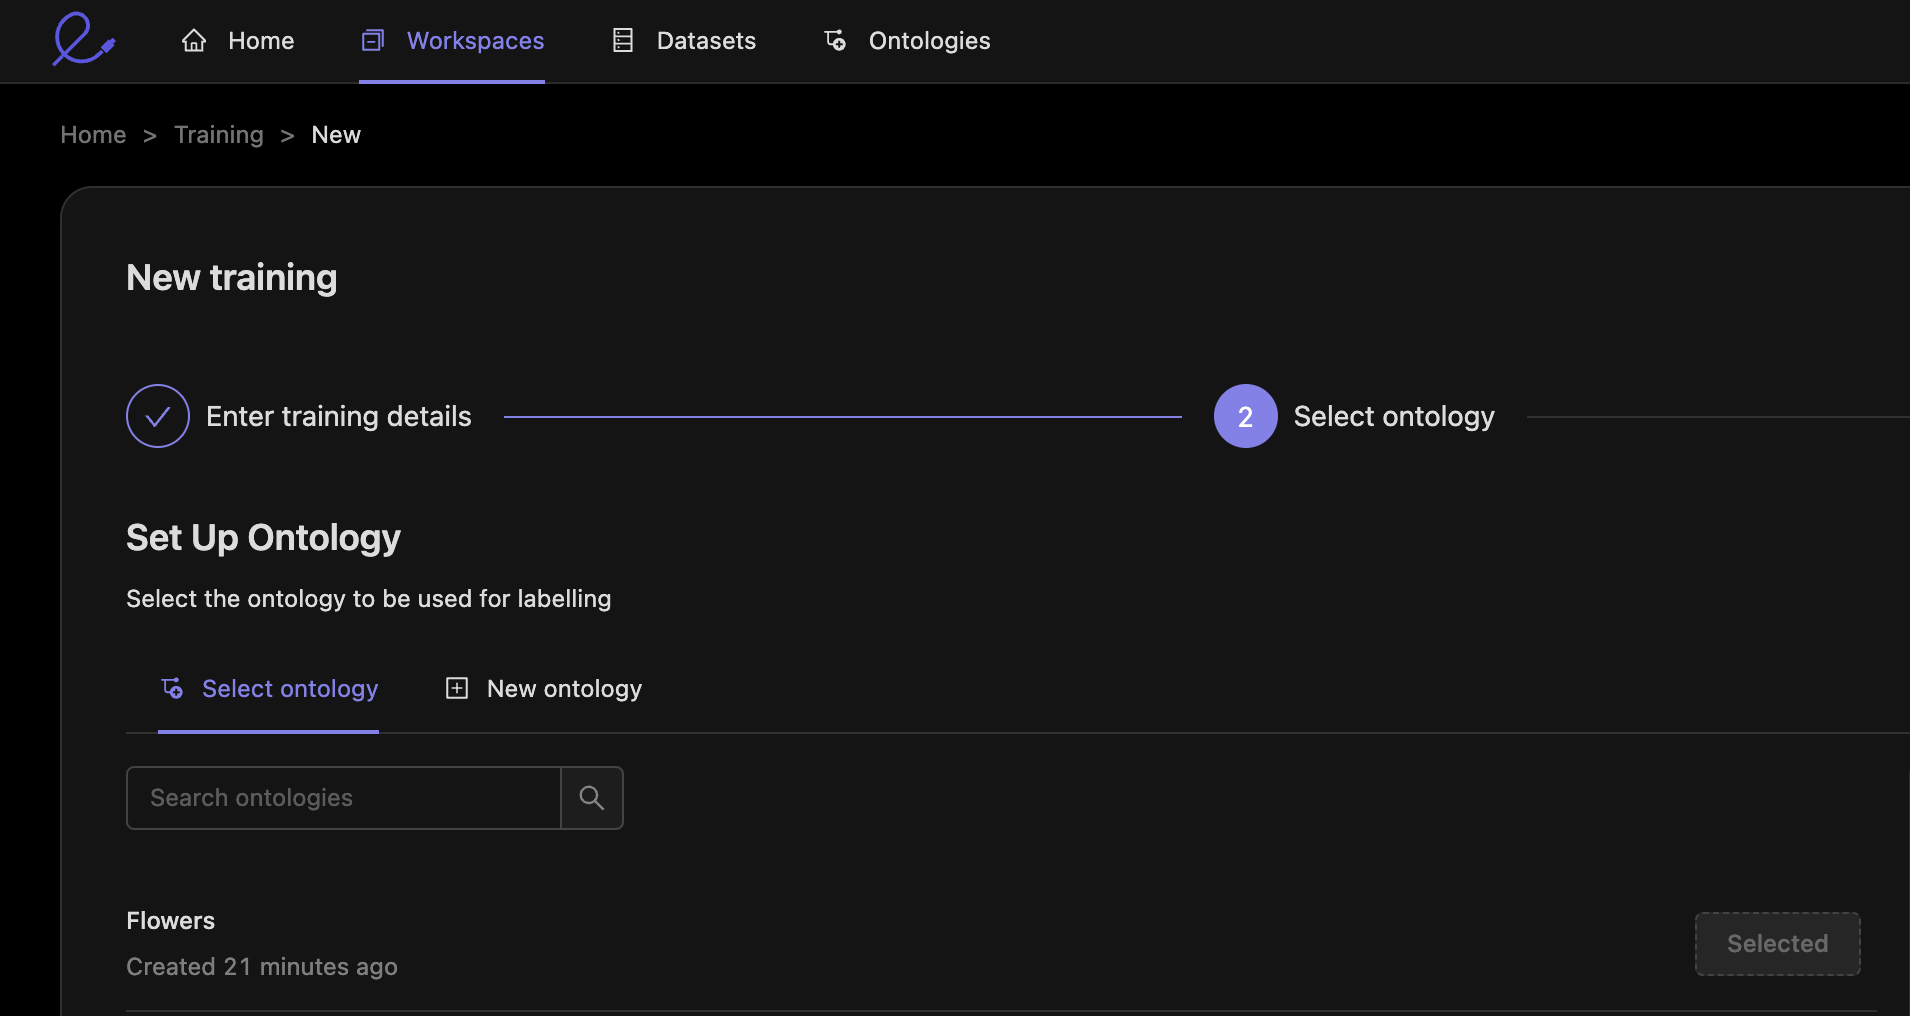
It is important that you select the same ontology as the benchmark project. This is because the scoring functions will be comparing the trainee annotations to the ground truth annotations.
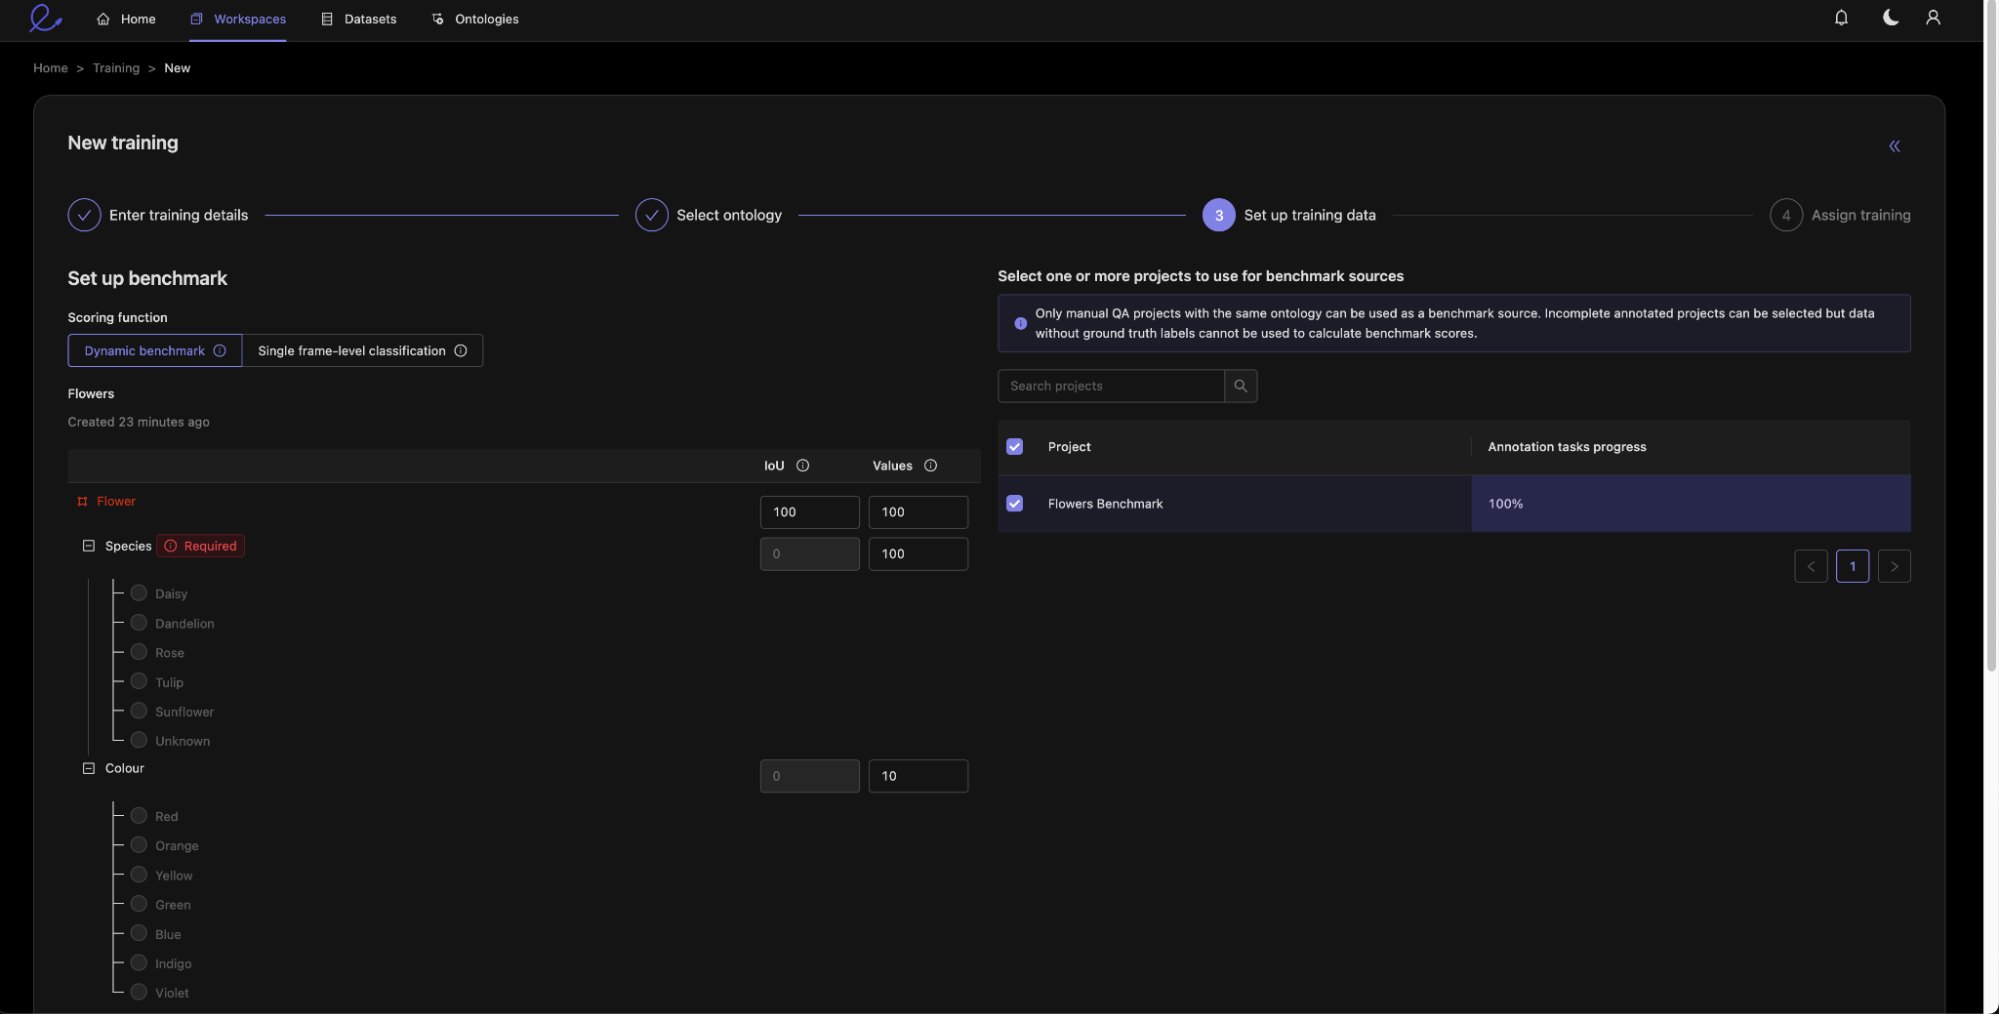
Next, we can set up the scoring. This will assign scores to the annotator submissions. Two key numbers are calculated:
- Intersection over Union (IoU): IoU is calculated for objects such as bounding boxes or polygons. The IoU is the fraction of overlap between the benchmark and trainee annotations.
- Comparison: The comparison compares whether two values are the same, for example the flower species.
You can then use the numbers to express the relative weights of different components of the annotations.
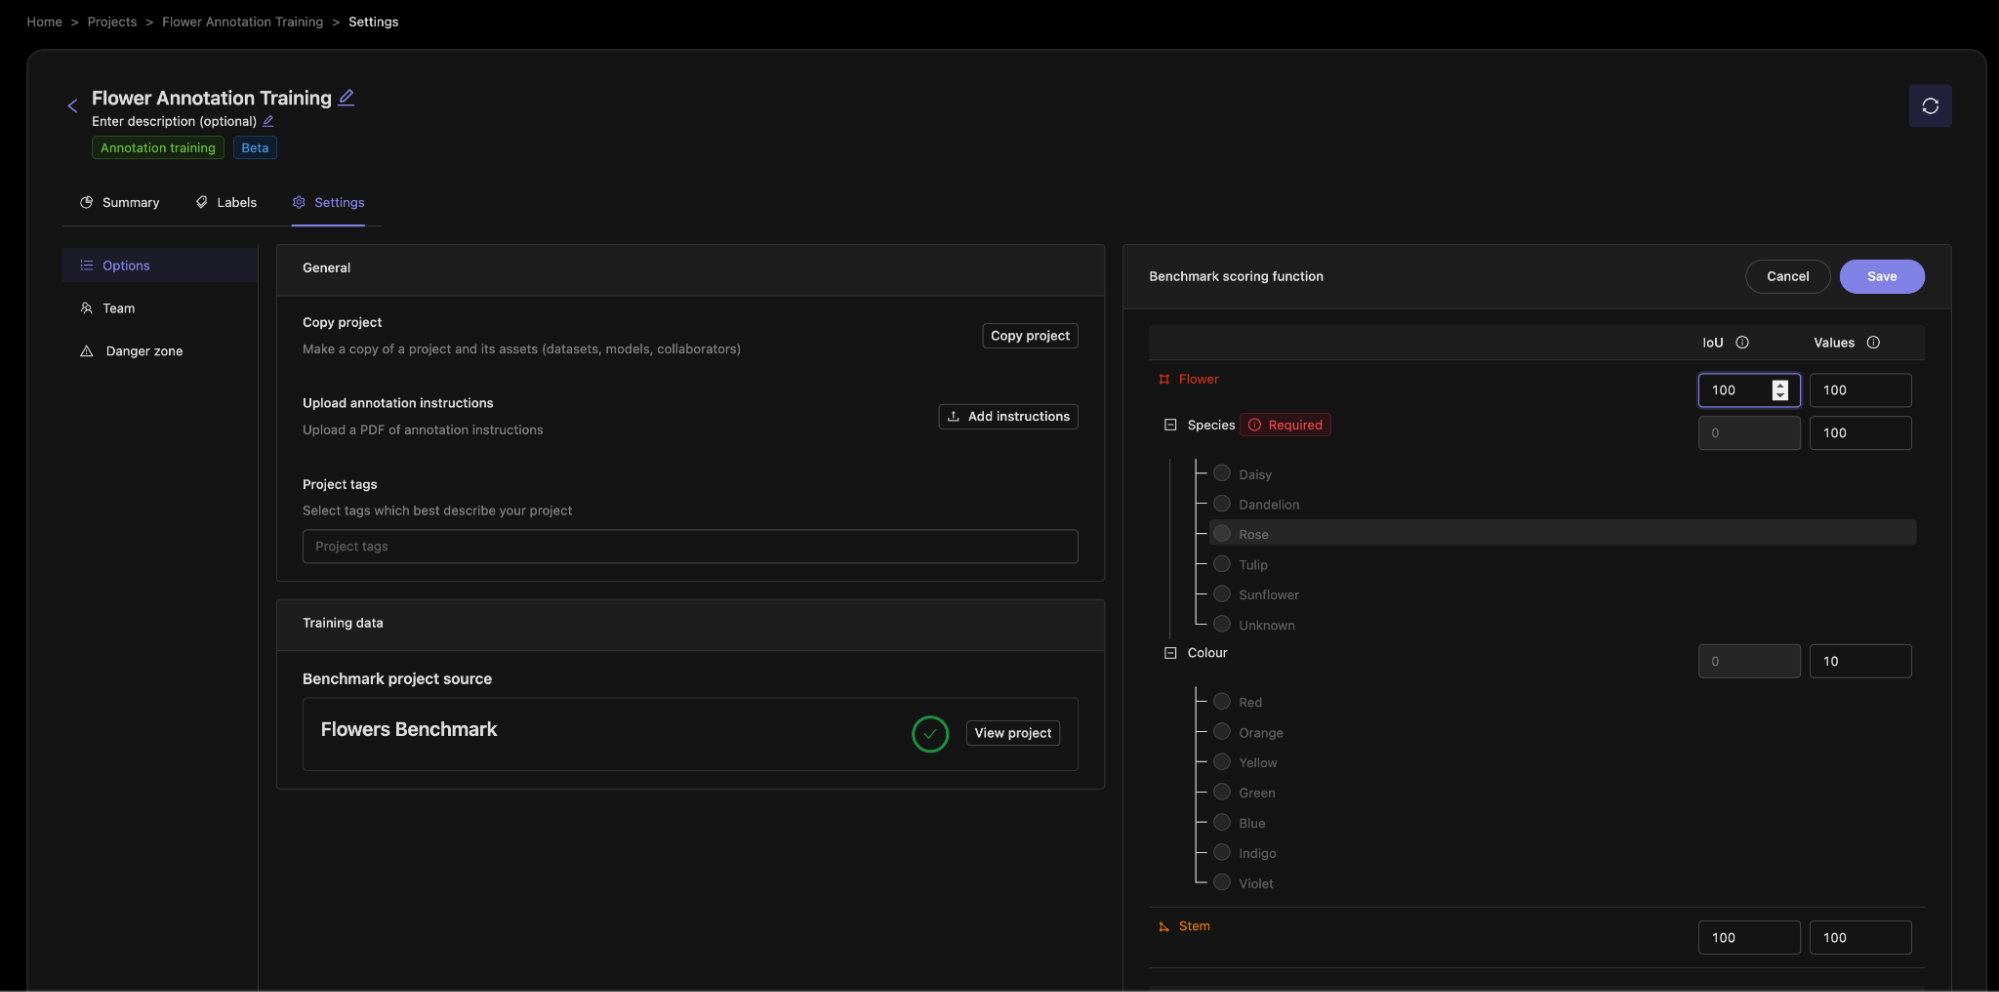
A higher score means that a component will be more important in calculating the overall score for an annotator. You can also think of this as the ‘number of points available’ for getting this part correct. You can see that I have given the flower species a weight of 100, whereas the flower color has a weight of 10 since it is less important to my use case and so if an annotator misses this or gets it wrong, then they will miss out on fewer points.
Finally, we assign annotators to the training module.
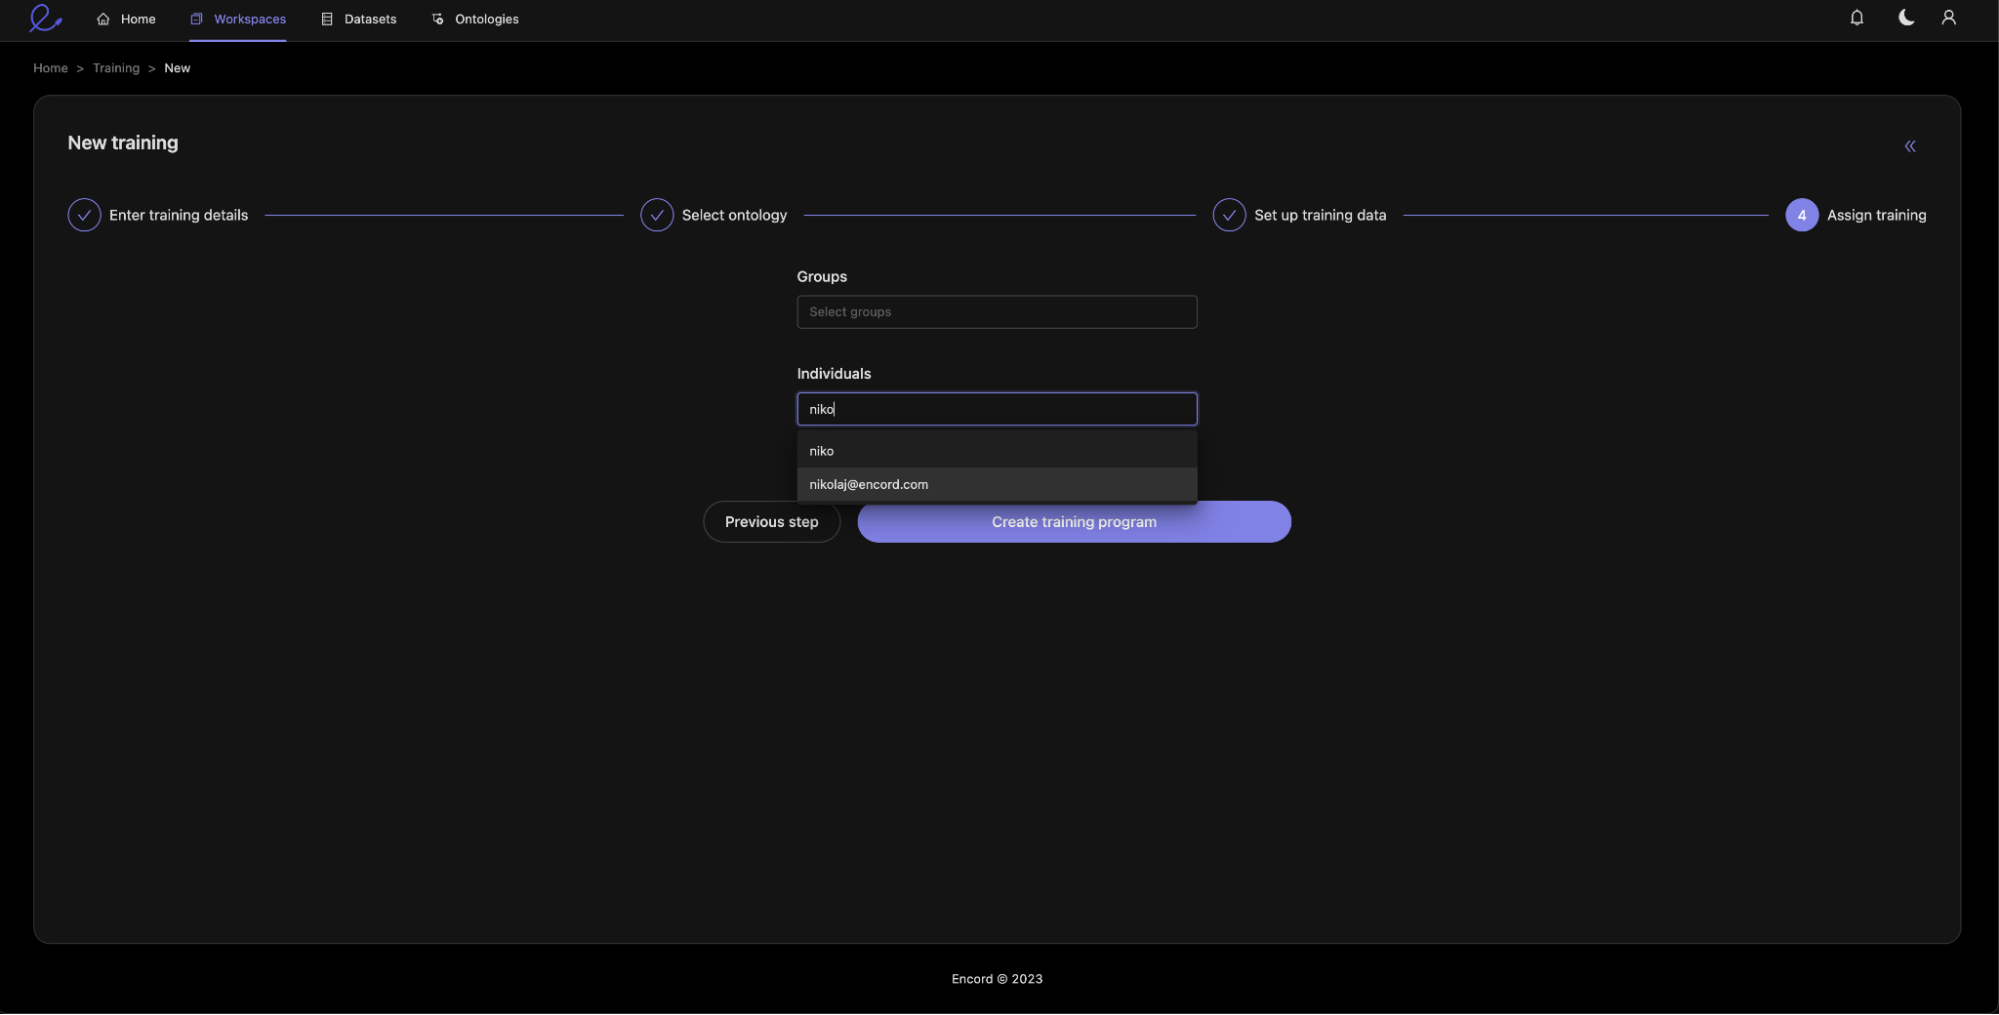
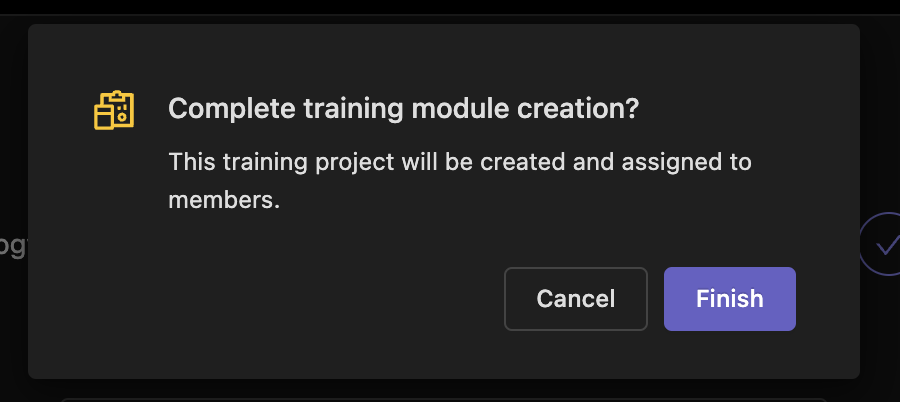
Step 5: Annotator Training
Each annotator will now see the labeling tasks assigned to them.
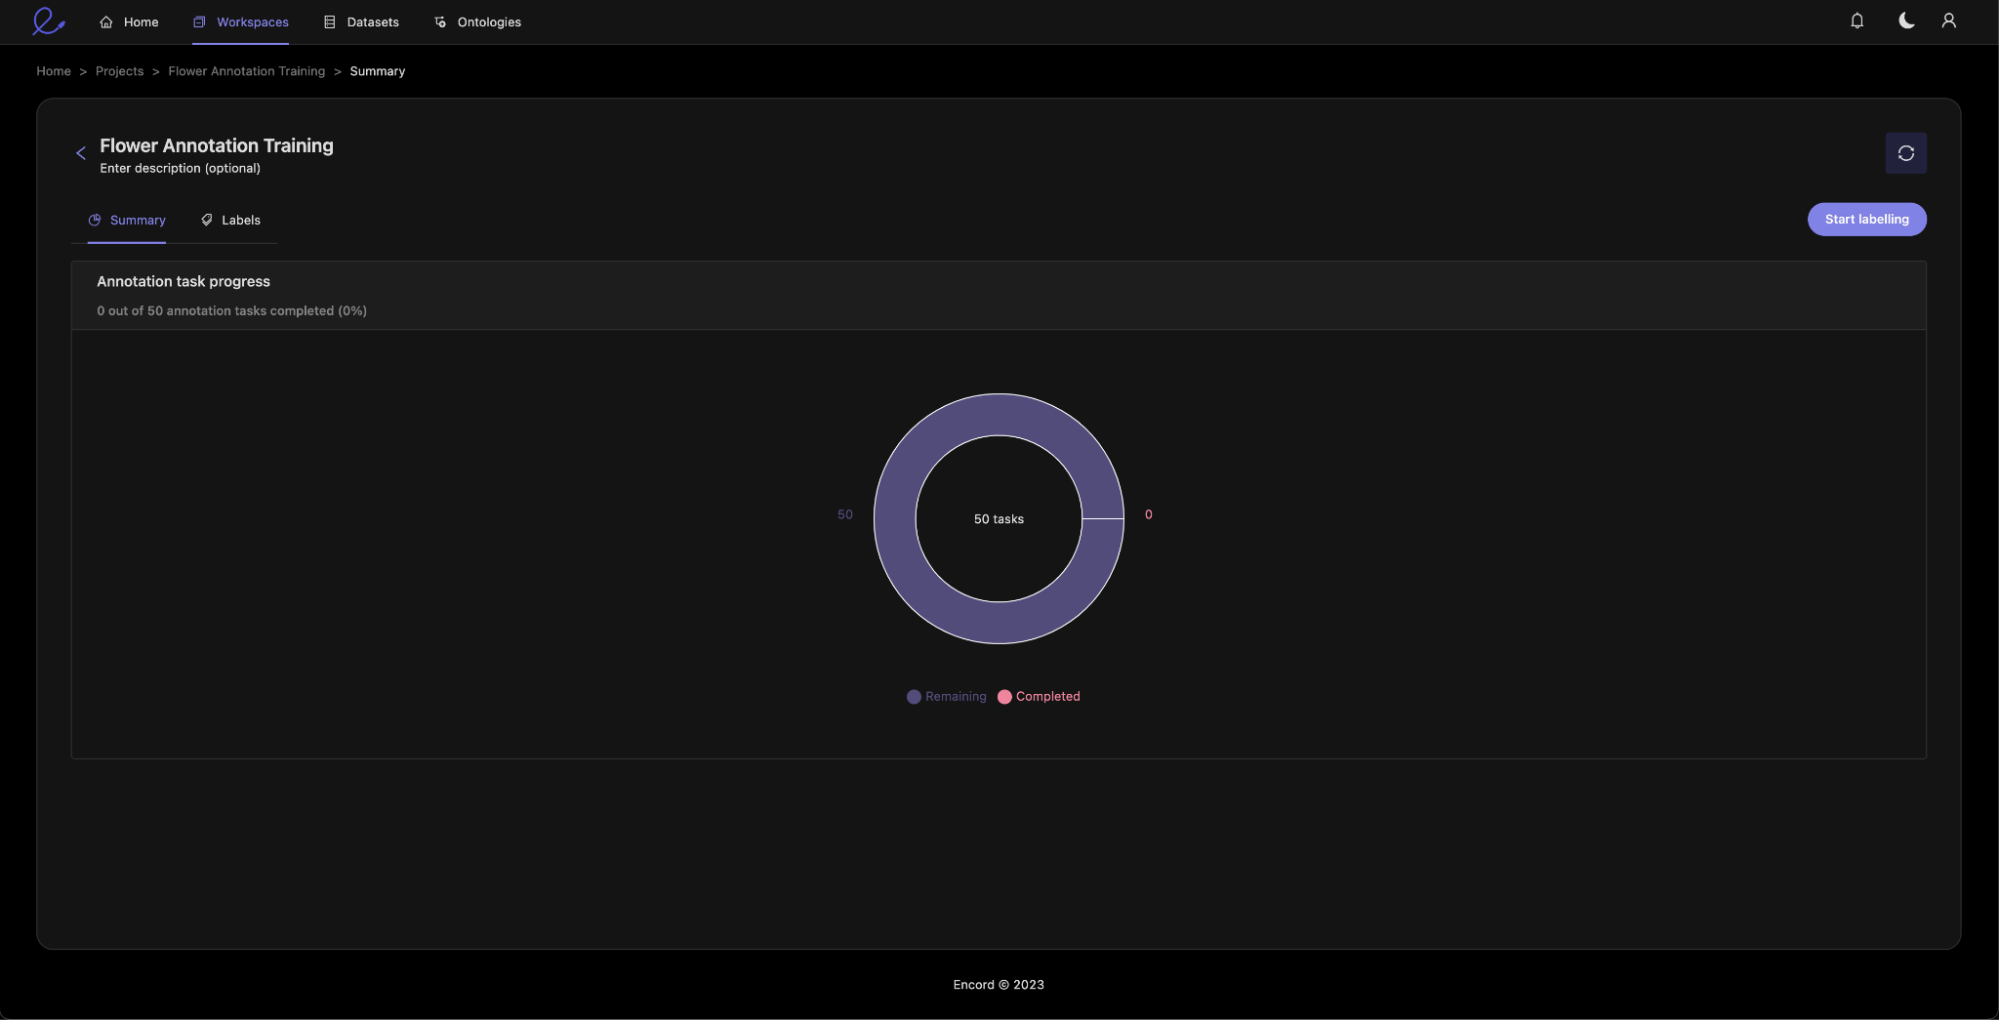
Step 6: Evaluation
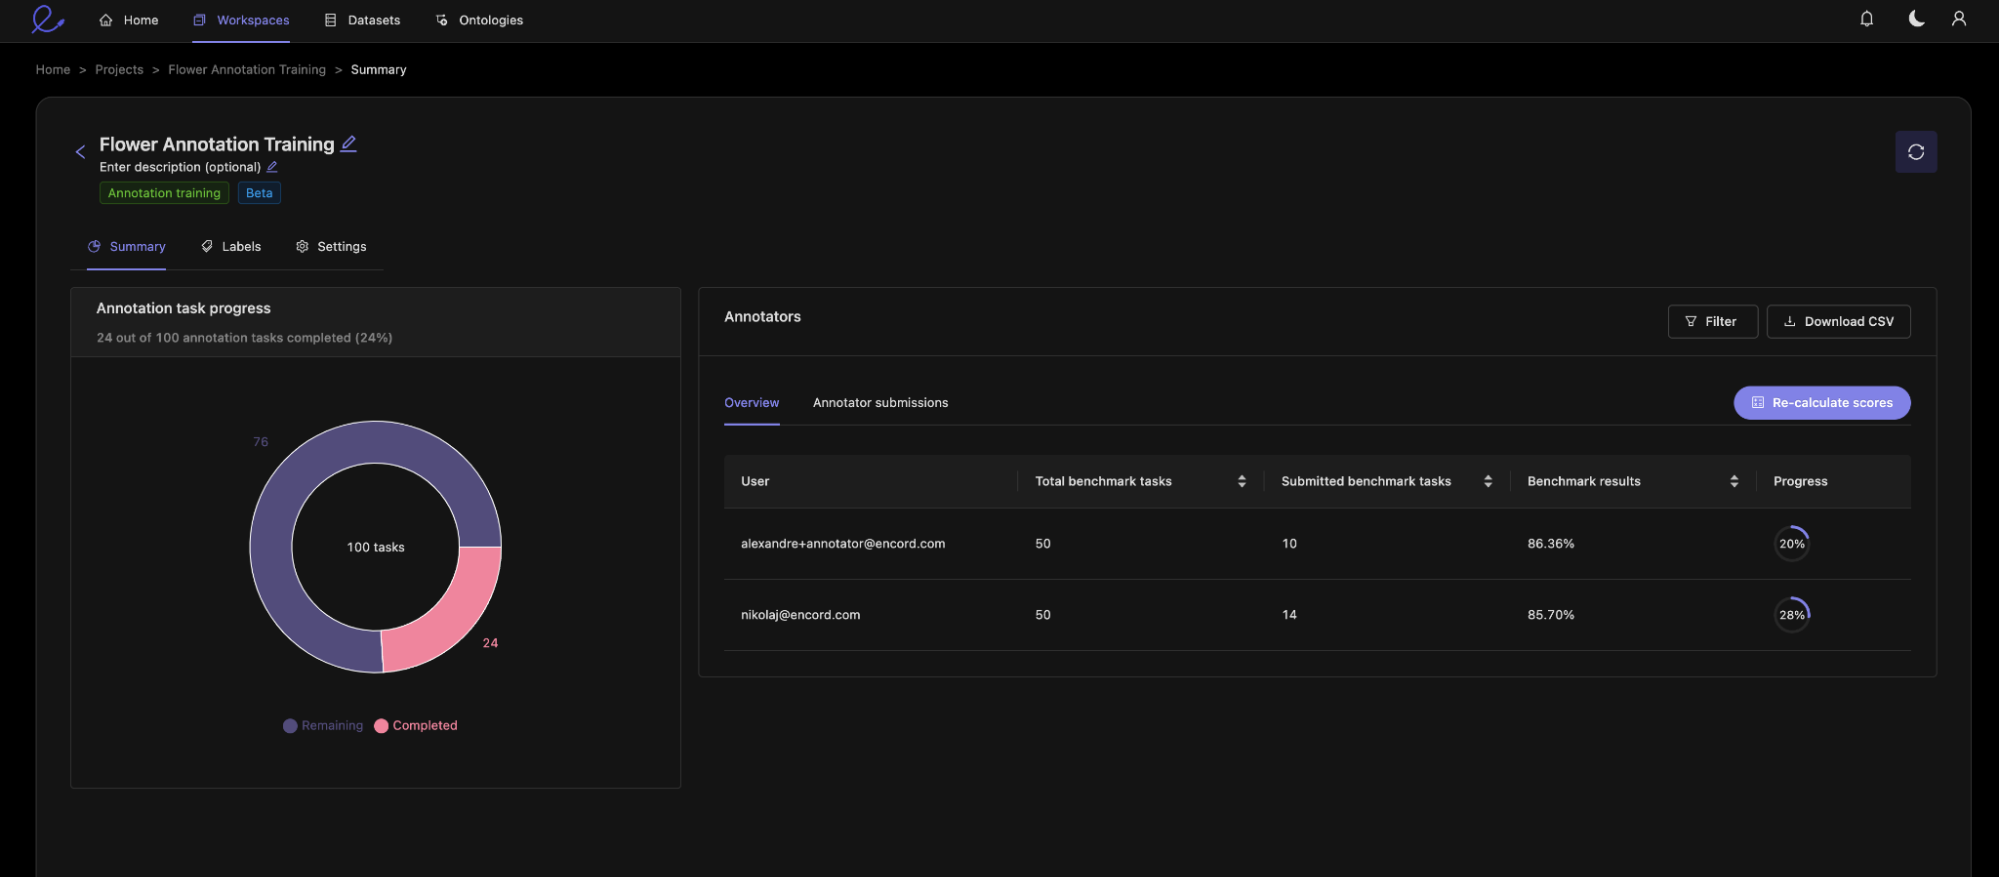
As the creator of the training module, you can see the performance of annotators as they progress through the training. Here you can see that my two trainees are progressing through the training module, having both completed around 20% of the assigned tasks. You can also see their overall score as a percentage. This score is calculated by the scoring function we set up during the project setup.
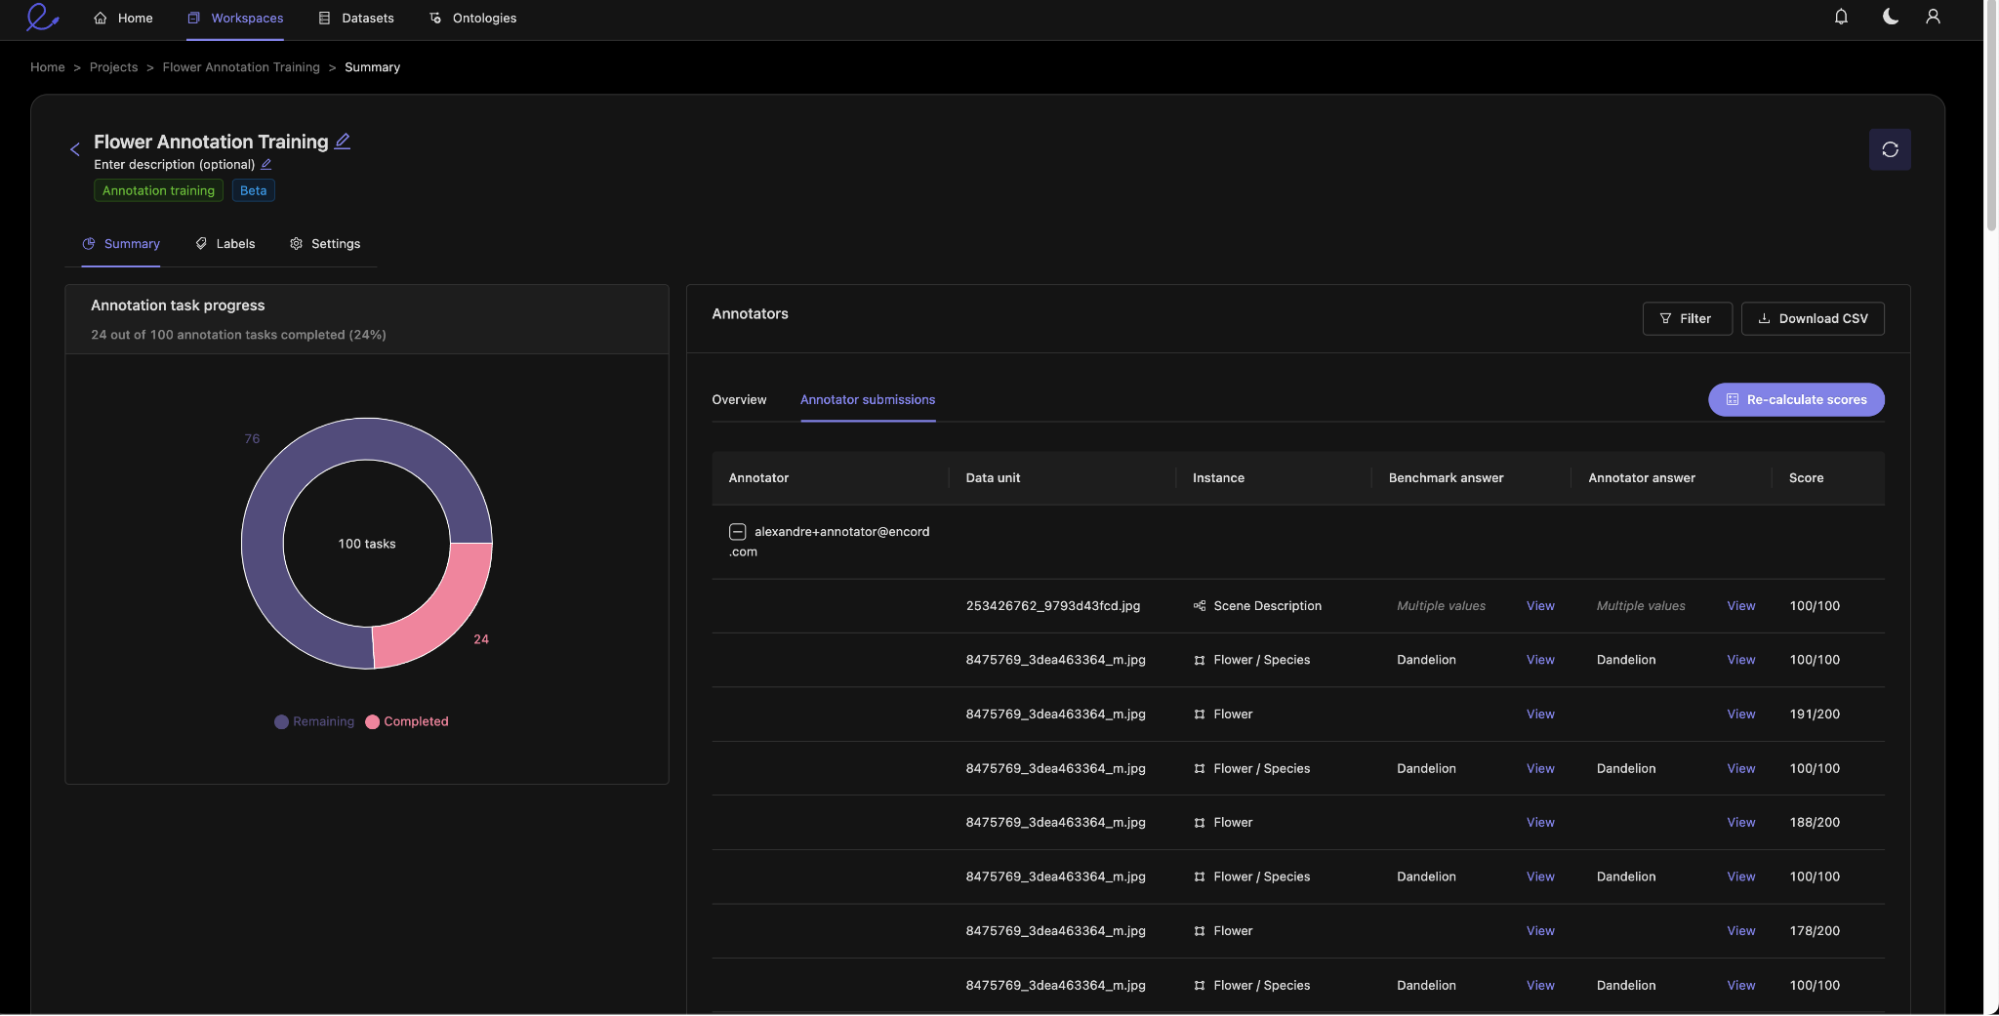
You can dive deeper into individual annotator performance by looking at the submissions tab, which gives you a preview of annotator submissions. For very large projects we can use the CSV export function to get all submissions.
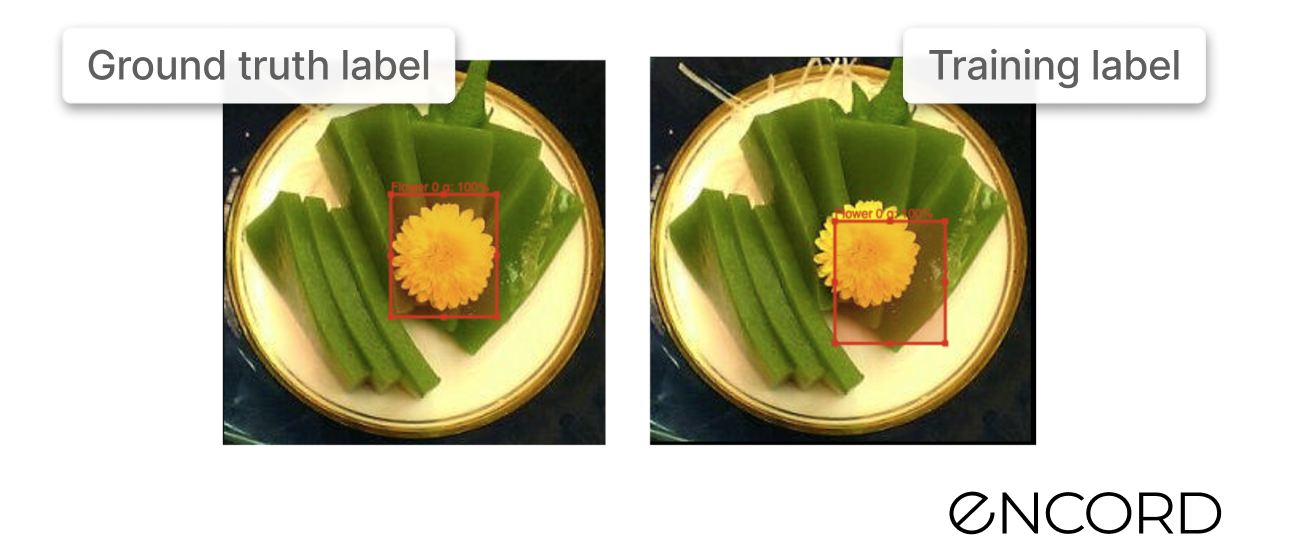
We can now dive deeper into annotator submissions, looking at this example where we notice some mistakes our trainee has made. You can see three things:
- The trainee mislabelled the flower species.
- The IoU score for the flower is low (143/200), indicating that the bounding box annotation is not precise.
- The trainee forgot to describe the scene.

By clicking ‘View’, we can see the annotations and indeed realize that this is a poor-quality annotation.
The ground truth annotation is shown on the left and the trainee image annotation is shown on the right.
You can also change the scoring function if you later decide that certain attributes are more important than others by navigating to the settings tab.
Once you have modified the scoring function, you need to hit ‘Recalculate Scores’ on the Summary tab to get the new scores.
As already mentioned, you can download a CSV to perform further programmatic analysis of the trainee's performance.
Best Practices for Using the Module
To ensure the success of your training project, it is important to follow some best practices when using Encord's Annotator Training Module:
Define the annotation task clearly:
It is important to provide a clear and concise description of the annotation task to ensure that annotators understand the requirements.
Use reviewed ground truth labels:
Providing reviewed ground truth labels ensures that the annotators have a clear understanding of what is required and helps to measure the accuracy of their annotations.
Evaluate annotator performance regularly:
Evaluating annotator performance regularly ensures that the annotations are of high quality and identifies any areas where additional training may be required.
Continuously improve the annotation training task:
As you progress, it is important to continuously review and improve the training tasks you have set up to ensure that it is meeting the project requirements.
Conclusion
Designed to help machine learning and data operation teams streamline their data labeling onboarding efforts by using existing training data to rapidly upskill new annotators, the new Annotator Training Module enables annotators to get up to speed quickly. This rapid onboarding ensures that businesses can derive insights and make better decisions from their data in a timely manner.
One platform for creating better training data and debugging models.
Want to stay updated?
- Follow us on Twitter and LinkedIn for more content on computer vision, training data, and active learning.
- Join the Slack community to chat and connect.
Explore the platform
Data infrastructure for multimodal AI
Explore product
Explore our products
The annotator QA feature allows users to create a dedicated ontology for quality assurance during annotation tasks. It includes various question types such as enums, checklists, and free text fields to ensure comprehensive reviews. This feature is designed to be flexible, enabling users to set required fields and streamline the scoring process.
Encord facilitates the training of annotators by providing structured training modules and workflow processes that help improve their efficiency and effectiveness. This approach ensures that annotators are well-equipped to handle tasks, leading to faster and more accurate annotations.
Encord's annotation training module enhances annotation quality by requiring annotators to complete tests before they are released into a production environment. This ensures that only qualified annotators work on the data, thereby increasing the overall accuracy of annotations.
In Encord, annotation projects focus on labeling data for specific tasks, while training projects are designed to enhance model performance through supervised learning. This distinction ensures that both data preparation and model training processes are optimized.
Encord provides comprehensive training resources and support for onboarding new team members. This includes access to documentation, tutorials, and personalized training sessions to ensure that all team members are well-acquainted with the platform's capabilities.
Encord provides tools that help annotators get up to speed with the best annotation practices. The platform includes AI-assisted tools that facilitate quicker and more accurate labeling, making it easier for teams to achieve high-quality annotations.
Yes, Encord allows users to mark specific fields as required within the annotator QA feature. This ensures that reviewers must complete all necessary information before finalizing their submissions, enhancing the quality of the review process.
Yes, Encord can showcase its active learning strategy, including model in the loop annotation. This approach enhances the annotation process by integrating model feedback into the workflow, improving efficiency and accuracy over time.
Yes, existing annotations can be reviewed and revised to include new subclasses. Users should communicate their specific needs for adjustments to ensure that the changes align with their project requirements.
