Contents
What is the Segment Anything Model (SAM)?
What is Model Fine-Tuning?
Why Would I Fine-Tune a Model?
How to Fine-Tune Segment Anything Model [With Code]
Fine-Tuning for Downstream Applications
Conclusion
Encord Blog
How To Fine-Tune The Segment Anything Model

Computer vision is having its ChatGPT moment with the release of the Segment Anything Model (SAM) by Meta last week. Trained over 11 billion segmentation masks, SAM is a foundation model for predictive AI use cases rather than generative AI. While it has shown an incredible amount of flexibility in its ability to segment over wide-ranging image modalities and problem spaces, it was released without “fine-tuning” functionality.
This tutorial will outline some of the key steps to fine-tune Segment Anything Model using the mask decoder, particularly describing which functions from SAM to use to pre/post-process the data so that it's in good shape for fine-tuning.

What is the Segment Anything Model (SAM)?
The Segment Anything Model (SAM) is a segmentation model developed by Meta AI. It is considered the first foundational model for Computer Vision. SAM was trained on a huge corpus of data containing millions of images and billions of masks, making it extremely powerful. As its name suggests, SAM is able to produce accurate segmentation masks for a wide variety of images. SAM’s design allows it to take human prompts into account, making it particularly powerful for Human In The Loop annotation. These prompts can be multi-modal: they can be points on the area to be segmented, a bounding box around the object to be segmented, or a text prompt about what should be segmented.
The model is structured into 3 components: an image encoder, a prompt encoder, and a mask decoder.

The image encoder generates an embedding for the image being segmented, whilst the prompt encoder generates an embedding for the prompts. The image encoder is a particularly large component of the model. This is in contrast to the lightweight mask decoder, which predicts segmentation masks based on the embeddings. Meta AI has made the weights and biases of the model trained on the Segment Anything 1 Billion Mask (SA-1B) dataset available as a model checkpoint.
What is Model Fine-Tuning?
Publicly available state-of-the-art models have a custom architecture and are typically supplied with pre-trained model weights. If these architectures were supplied without weights then the models would need to be trained from scratch by the users, who would need to use massive datasets to obtain state-of-the-art performance.
Model fine-tuning is the process of taking a pre-trained model (architecture+weights) and showing it data for a particular use case. This will typically be data that the model hasn’t seen before, or that is underrepresented in its original training dataset.
The difference between fine-tuning the model and starting from scratch is the starting value of the weights and biases. If we were training from scratch, these would be randomly initialized according to some strategy. In such a starting configuration, the model would ‘know nothing’ of the task at hand and perform poorly. By using pre-existing weights and biases as a starting point we can ‘fine tune’ the weights and biases so that our model works better on our custom dataset. For example, the information learned to recognize cats (edge detection, counting paws) will be useful for recognizing dogs.
Why Would I Fine-Tune a Model?
The purpose of fine-tuning a model is to obtain higher performance on data that the pre-trained model has not seen before. For example, an image segmentation model trained on a broad corpus of data gathered from phone cameras will have mostly seen images from a horizontal perspective.
If we tried to use this model for satellite imagery taken from a vertical perspective, it may not perform as well. If we were trying to segment rooftops, the model may not yield the best results. The pre-training is useful because the model will have learned how to segment objects in general, so we want to take advantage of this starting point to build a model that can accurately segment rooftops. Furthermore, it is likely that our custom dataset would not have millions of examples, so we want to fine-tune instead of training the model from scratch.
Fine tuning is desirable so that we can obtain better performance on our specific use case, without having to incur the computational cost of training a model from scratch.
How to Fine-Tune Segment Anything Model [With Code]
Background & Architecture
We gave an overview of the SAM architecture in the introduction section. The image encoder has a complex architecture with many parameters. In order to fine-tune the model, it makes sense for us to focus on the mask decoder which is lightweight and therefore easier, faster, and more memory efficient to fine-tune.
In order to fine-tune SAM, we need to extract the underlying pieces of its architecture (image and prompt encoders, mask decoder). We cannot use SamPredictor.predict (link) for two reasons:
- We want to fine-tune only the mask decoder
- This function calls SamPredictor.predict_torch which has the @torch.no_grad() decorator (link), which prevents us from computing gradients
Thus, we need to examine the SamPredictor.predict function and call the appropriate functions with gradient calculation enabled on the part we want to fine-tune (the mask decoder). Doing this is also a good way to learn more about how SAM works.
Creating a Custom Dataset
Using Encord Index, you can easily curate and manage the custom datasets needed for your model. This platform allows for efficient organization and visualization of images, segmentation masks, and prompts, streamlining the dataset creation process.
Now, we need three things to fine-tune our model:
- Images on which to draw segmentations
- Segmentation ground truth masks
- Prompts to feed into the model
We chose the stamp verification dataset (link) since it has data that SAM may not have seen in its training (i.e., stamps on documents). We can verify that it performs well, but not perfectly, on this dataset by running inference with the pre-trained weights. The ground truth masks are also extremely precise, which will allow us to calculate accurate losses. Finally, this dataset contains bounding boxes around the segmentation masks, which we can use as prompts to SAM. An example image is shown below. These bounding boxes align well with the workflow that a human annotator would go through when looking to generate segmentations.

Input Data Preprocessing
We need to preprocess the scans from numpy arrays to pytorch tensors. To do this, we can follow what happens inside SamPredictor.set_image (link) and SamPredictor.set_torch_image (link) which preprocesses the image. First, we can use utils.transform.ResizeLongestSide to resize the image, as this is the transformer used inside the predictor (link). We can then convert the image to a pytorch tensor and use the SAM preprocess method (link) to finish preprocessing.
Training Setup
We download the model checkpoint for the vit_b model and load them in:
sam_model = sam_model_registry['vit_b'](checkpoint='sam_vit_b_01ec64.pth')
We can set up an Adam optimizer with defaults and specify that the parameters to tune are those of the mask decoder:
optimizer = torch.optim.Adam(sam_model.mask_decoder.parameters())
At the same time, we can set up our loss function, for example Mean Squared Error
loss_fn = torch.nn.MSELoss()
Training Loop
In the main training loop, we will be iterating through our data items, generating masks, and comparing them to our ground truth masks so that we can optimize the model parameters based on the loss function.
In this example, we used a GPU for training since it is much faster than using a CPU. It is important to use .to(device) on the appropriate tensors to make sure that we don’t have certain tensors on the CPU and others on the GPU.
We want to embed images by wrapping the encoder in the torch.no_grad() context manager, since otherwise we will have memory issues, along with the fact that we are not looking to fine-tune the image encoder.
with torch.no_grad():
	image_embedding = sam_model.image_encoder(input_image)
We can also generate the prompt embeddings within the no_grad context manager. We use our bounding box coordinates, converted to pytorch tensors.
with torch.no_grad():
      sparse_embeddings, dense_embeddings = sam_model.prompt_encoder(
          points=None,
          boxes=box_torch,
          masks=None,
      )
Finally, we can generate the masks. Note that here we are in single mask generation mode (in contrast to the 3 masks that are normally output).
low_res_masks, iou_predictions = sam_model.mask_decoder(
  image_embeddings=image_embedding,
  image_pe=sam_model.prompt_encoder.get_dense_pe(),
  sparse_prompt_embeddings=sparse_embeddings,
  dense_prompt_embeddings=dense_embeddings,
  multimask_output=False,
)
The final step here is to upscale the masks back to the original image size since they are low resolution. We can use Sam.postprocess_masks to achieve this. We will also want to generate binary masks from the predicted masks so that we can compare these to our ground truths. It is important to use torch functionals in order to not break backpropagation.
upscaled_masks = sam_model.postprocess_masks(low_res_masks, input_size, original_image_size).to(device)

from torch.nn.functional import threshold, normalize

binary_mask = normalize(threshold(upscaled_masks, 0.0, 0)).to(device)
Finally, we can calculate the loss and run an optimization step:
loss = loss_fn(binary_mask, gt_binary_mask)
optimizer.zero_grad()
loss.backward()
optimizer.step()
By repeating this over a number of epochs and batches we can fine-tune the SAM decoder.
Saving Checkpoints and Starting a Model from it
Once we are done with training and satisfied with the performance uplift, we can save the state dict of the tuned model using:
torch.save(model.state_dict(), PATH)
We can then load this state dict when we want to perform inference on data that is similar to the data we used to fine-tune the model.
Fine-Tuning for Downstream Applications
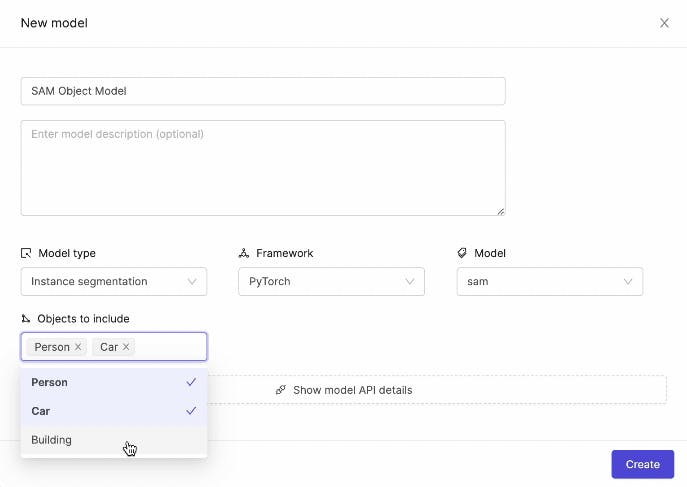
While SAM does not currently offer fine-tuning out of the box, we are building a custom fine-tuner integrated with the Encord platform. As shown in this post, we fine-tune the decoder in order to achieve this. This is available as an out-of-the-box one-click procedure in the web app, where the hyperparameters are automatically set.
Original vanilla SAM mask:

Mask generated by fine-tuned version of the model:

We can see that this mask is tighter than the original mask. This was the result of fine-tuning on a small subset of images from the stamp verification dataset, and then running the tuned model on a previously unseen example. With further training and more examples, we could obtain even better results.
Conclusion
That's all, folks!
You have now learned how to fine-tune the Segment Anything Model (SAM). If you're looking to fine-tune SAM out of the box, you might also be interested to learn that we have recently released the Segment Anything Model in Encord, allowing you to fine-tune the model without writing any code.

Explore the platform
Data infrastructure for multimodal AI
Explore product
Explore our products
Yes, SAM can be fine-tuned to adapt its performance to specific tasks or datasets, enhancing its capabilities and accuracy.
Fine-tuning in generative AI involves adjusting pre-trained models on new data, refining their parameters to improve performance for specific tasks.
Fine-tuning can be challenging due to the need for carefully chosen hyperparameters and potential overfitting to the training data.
Implementing a Segment Anything model involves preparing data (dataset used for training SA 1B is also available), selecting the model checkpoints available in the GitHub, fine-tuning on specific tasks, and evaluating performance metrics.
SAM (Segment Anything Model) is a versatile deep learning model designed for image segmentation tasks. Trained on the SA-1B dataset, featuring over 1 billion masks on 11M images, SAM excels in zero-shot transfers to new tasks and distributions.
Segmentation provides detailed object boundaries, offering precise localization compared to detection, which identifies objects but lacks boundary information, making segmentation more suitable for tasks requiring accuracy in object delineation.
Utilize the SAM model by fine-tuning it on relevant data for specific segmentation tasks, ensuring proper evaluation and adjustment to achieve desired performance levels.
Encord specializes in multimodal AI and supports various types of model fine-tuning, particularly in the realm of textual AI. This includes fine-tuning for moderation endpoints, ensuring that models operate effectively in sensitive environments such as financial services and consumer-facing products.
Encord focuses on three main areas to enhance model performance: data curation, model monitoring, and identifying label errors. By leveraging these features, users can streamline their processes, reduce manual checks, and ultimately boost the accuracy and efficiency of their models.
Encord has built-in tools for evaluating model performance, including confusion matrices and confidence score assessments. These features help users analyze how well their models are performing on specific tasks, which is essential for refining and improving model accuracy.
Moderation endpoints play a crucial role in ensuring that AI models are safe and appropriate for end users. Encord helps fine-tune models to navigate sensitive interactions, particularly in sectors such as finance and child-focused products, where user safety is paramount.
Encord values customer input and includes select clients in our beta program for early access to new features. During our scheduled meetings, we will collaborate with you to gather feedback, ensuring that the platform evolves to meet your needs effectively.
Encord places a strong emphasis on identifying edge cases during the annotation process. Our dedicated quality management ensures that all aspects of the annotation meet the required standards, preventing any quality issues from slipping through the cracks.
Encord facilitates model evaluation by integrating model predictions and identifying edge cases that affect performance. This feedback loop allows users to refine their annotation workflows and enhance the accuracy of their models over time.
Encord incorporates formal review or QA stages within the labeling workflow, allowing for structured oversight of the annotation process. Users can track annotation time and review time to ensure quality and efficiency in their projects.
